Public Cloud Connectivity - Modifier une connectivité cloud
Dans ce guide nous allons parcourir les étapes de modification d'un connecteur cloud qui est à l'état DESIGNED.
Depuis l'inventaire, sélectionner un connecteur cloud
Seuls les connecteurs cloud à l'état DESIGNED peuvent être modifiés.
Sélectionnez le connecteur cloud dans la liste et cliquez sur les trois points à droite et cliquer sur Edit connector.
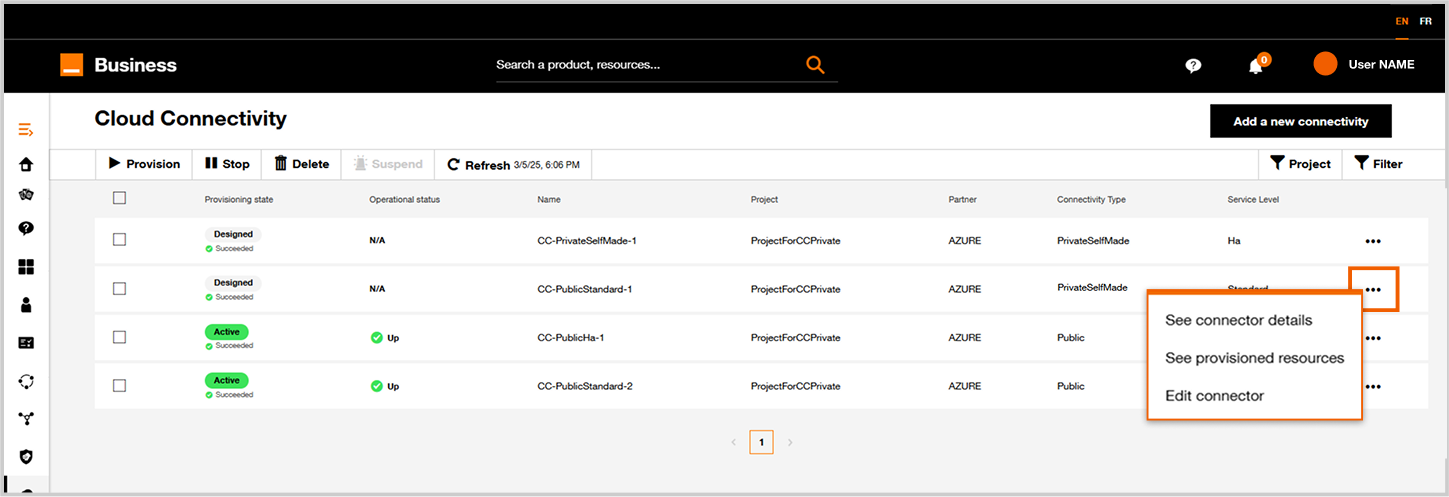
Inventaire des connecteurs cloud.
Étape 1 : Projet
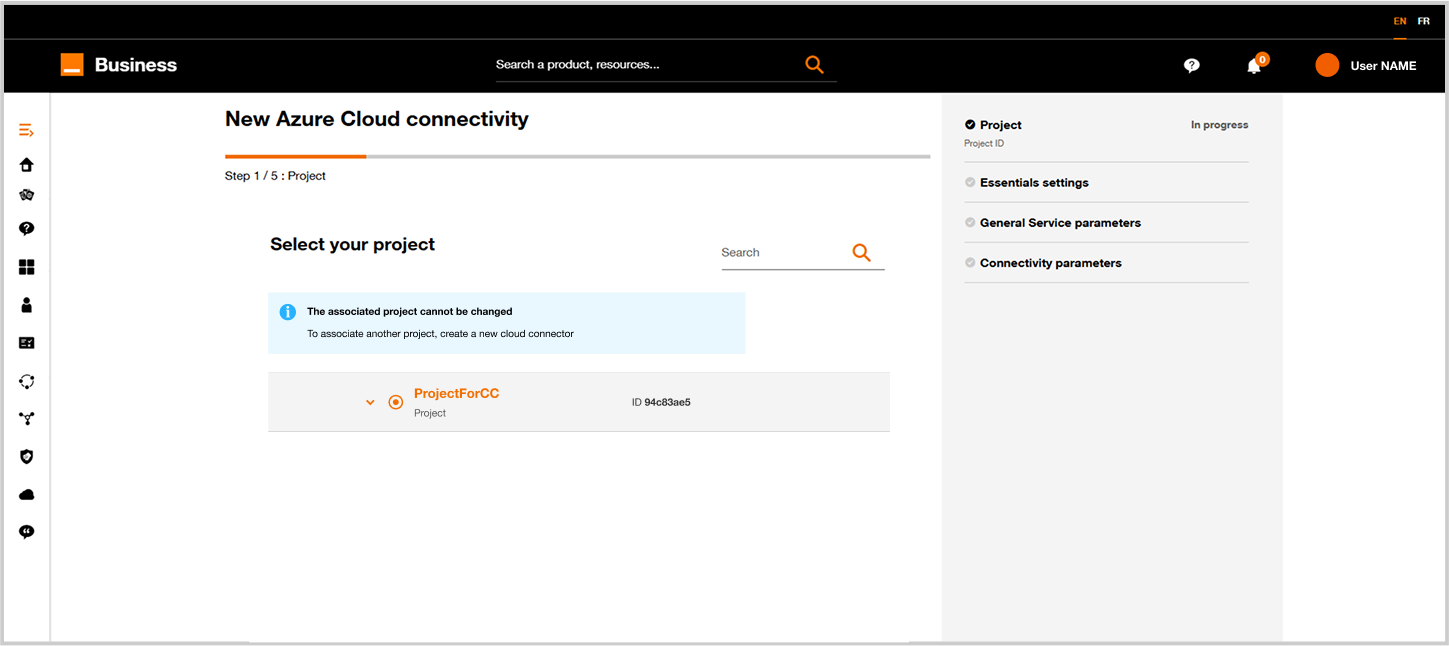
Modification d'un connecteur cloud. Étape 1.
Vous ne pouvez pas modifier le projet rattaché au connecteur cloud.
Vous devez créer un nouveau connecteur cloud avec le projet correspondant.
Étape 2 : Modifier les paramètres du connecteur cloud
Le parcours est sensiblement le même que celui de la création, à l’exception de l’option "Cas d'usage" (3ème écran) qui ne peut pas être modifiée.
Après avoir cliqué sur « Suivant », le formulaire suivant s'affichera :
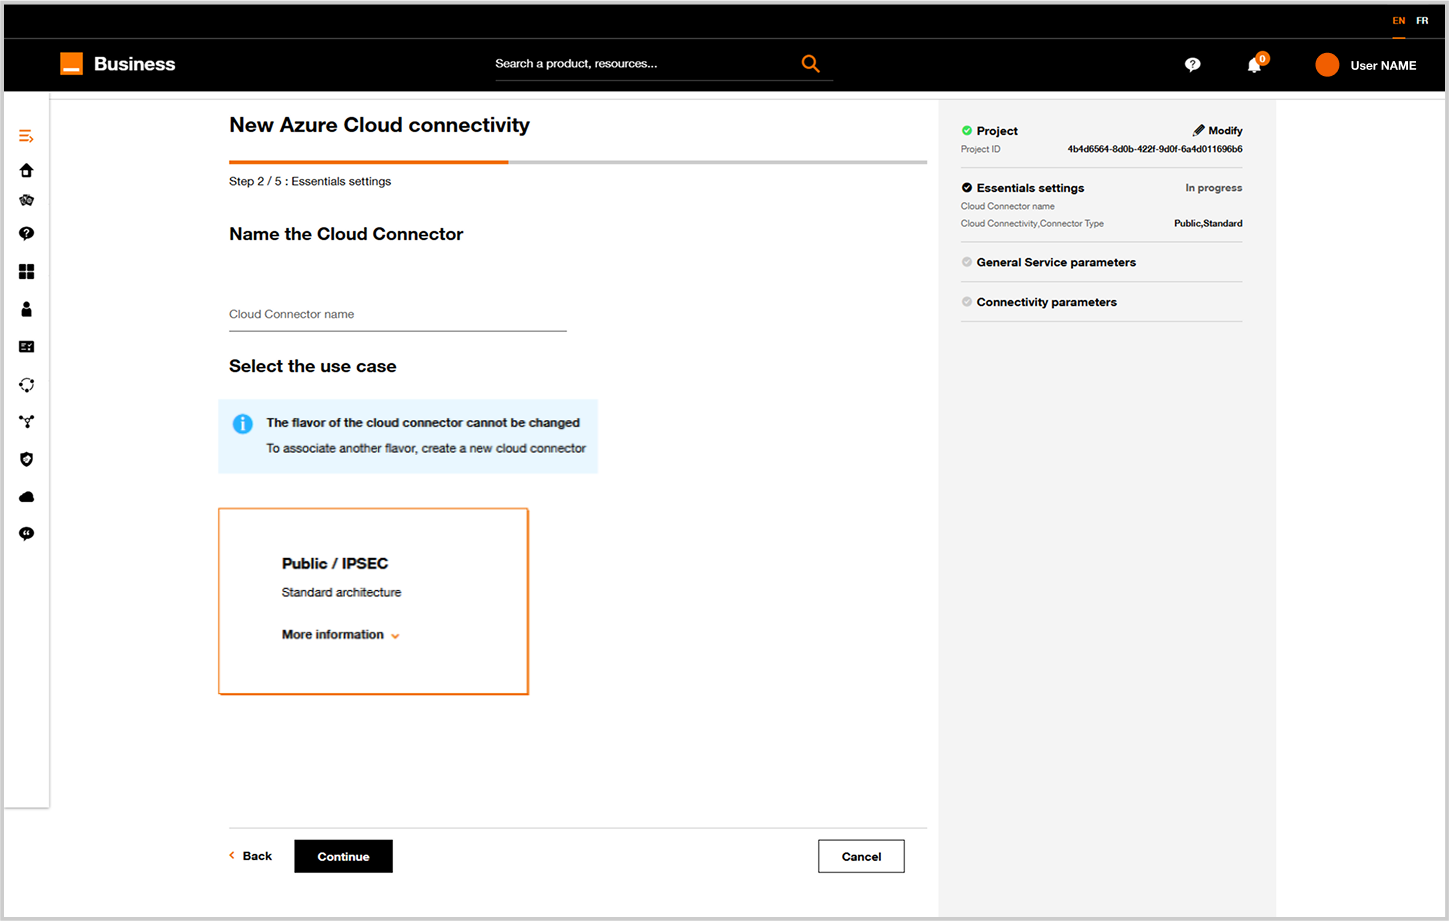
Modifier les paramètres du connecteur cloud
Étape 3 : Configuration des POP d'Orange Business
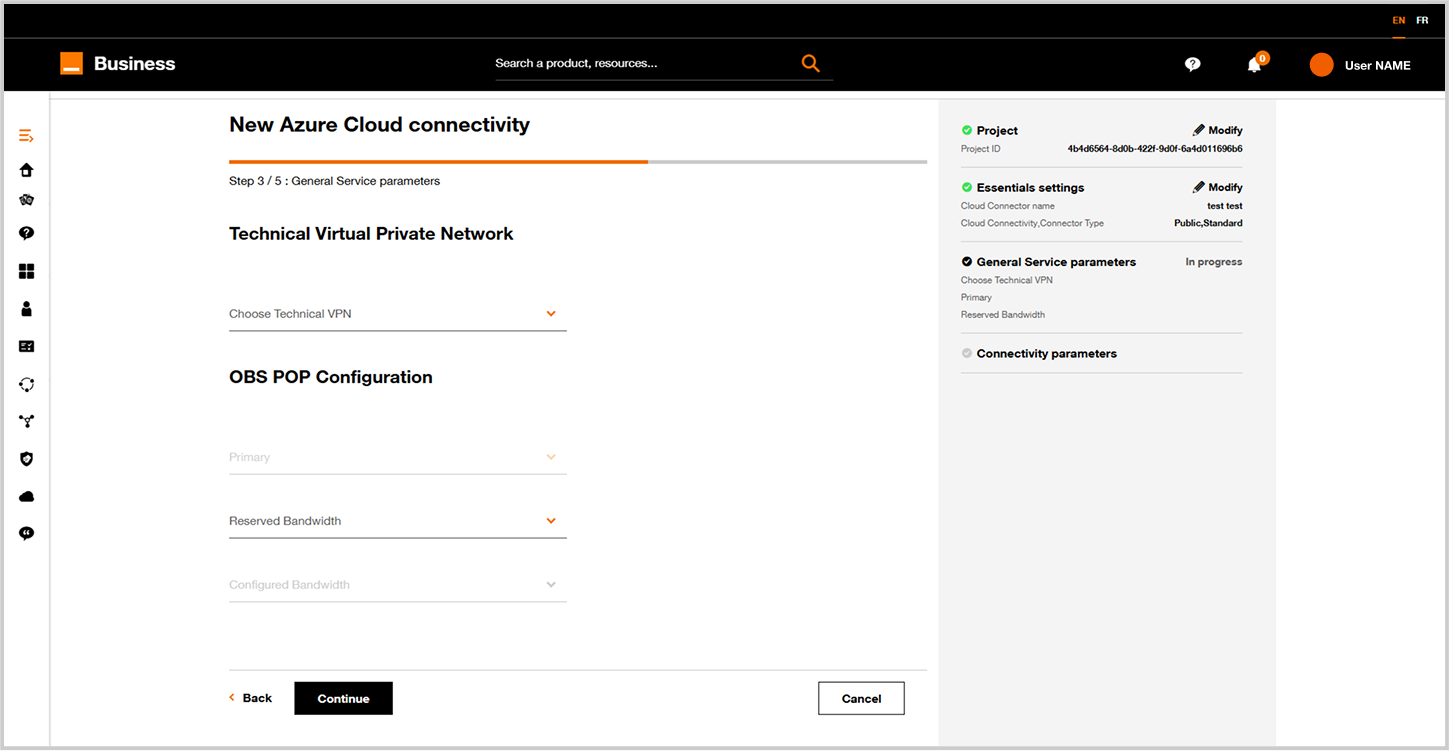
Choix des pops.
Vous pouvez mettre à jour les paramètres suivants :
- Le POP Orange à partir duquel vous souhaitez construire le connecteur Cloud. (Rappel: une connexion standard un seul POP, pour HA, un POP primaire et un POP secondaire)
- La bande passante réservée requise.
- La bande passante configurée dont vous avez besoin.
Étape 4. : Réseau privé virtuel technique
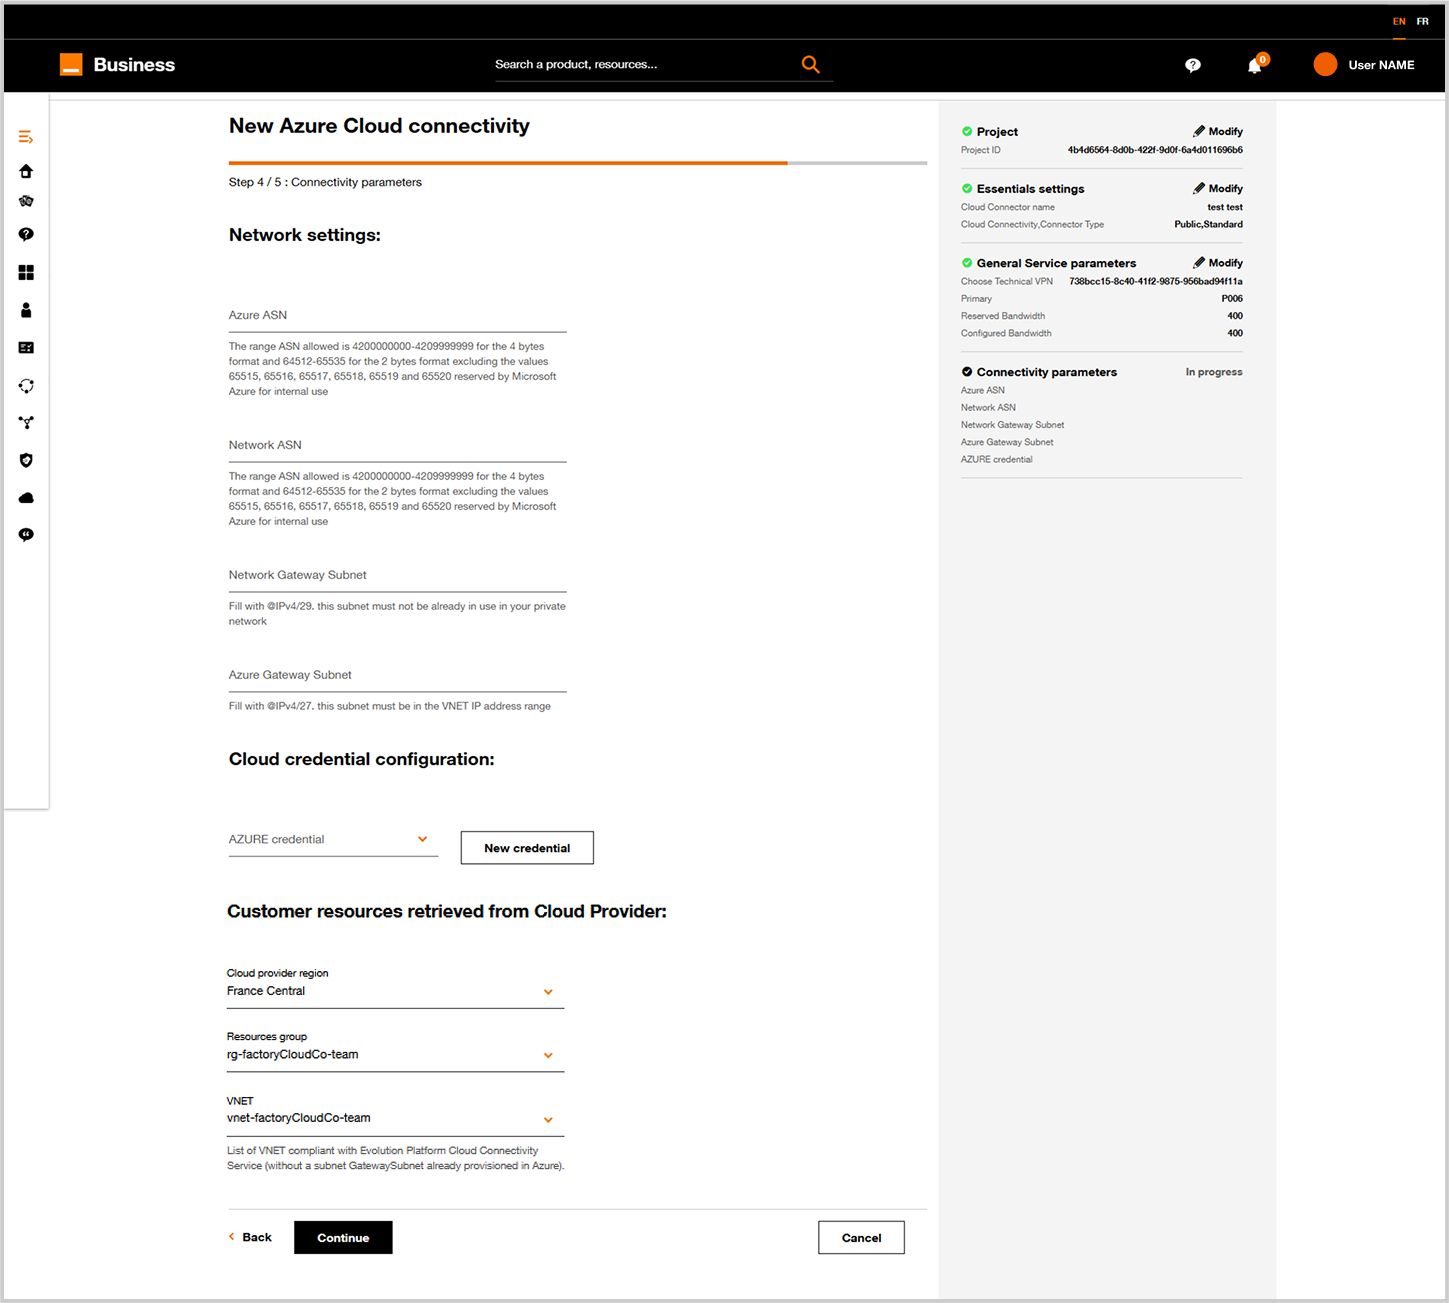
Configuration VPN.
Indiquer les paramètres réseaux à utiliser.
| Parameter | Description |
|---|---|
| Azure ASN (AS Number) | BGP Private ASN allocated by the customer to identify AZURE IP routes announced to Orange Business Network. This ASN has to be unique in the whole customer network. Private ASN range is 64512 to 6553. 65515 to 65520 are excluded as there are used by Microsoft Azure for internal use. |
| Network ASN (AS Number) | BGP Private ASN allocated by the customer to identify Orange Business IP routes announced to AZURE Network. This ASN has to be unique in the whole customer network. Private ASN range is 64512 to 65535. 65515 to 65520 are excluded as there are used by Microsoft Azure for internal use. |
| Network Gateway Subnet | A /29 IPv4 address allocated by the customer. This /29 have to be unique in the whole customer private network (including VNET/VPC in Cloud) |
| Azure Gateway Subnet | a /27 IPv4 address subnet for VPNGW addressing within the VNET addressing plan in AZURE. CIDR notation (i.e something like 192.xxx.xxx.xxx/27). |
Configuration des identifiants et des ressources utilisateur
Sélectionner les informations d'identification Cloud à utiliser pour atteindre les ressources Azure VNET, puis sélectionner la région Azure, le groupe de ressources et le VNET.
Le groupe de ressources et le VNET sont récupérés à partir de l'environnement Azure du client lié aux informations d'identification Cloud sélectionnées.
Si un VNET est déjà utilisé avec une passerelle VPN, il ne sera pas affiché dans la liste des VNET.
Pour plus d'informations sur l'identification Cloud, consultez la section Identifiants Cloud, puis cliquez sur le bouton Suivant
Mettre à jour les ressources cloud puis cliquer sur Suivant.
5. Récapitulatif et Tarifs
- Sur cet écran vous avez à droite un récapitulatif de la configuration du connecteur cloud.
- Bientôt vous aurez une estimation du prix de ce connecteur cloud configuré.
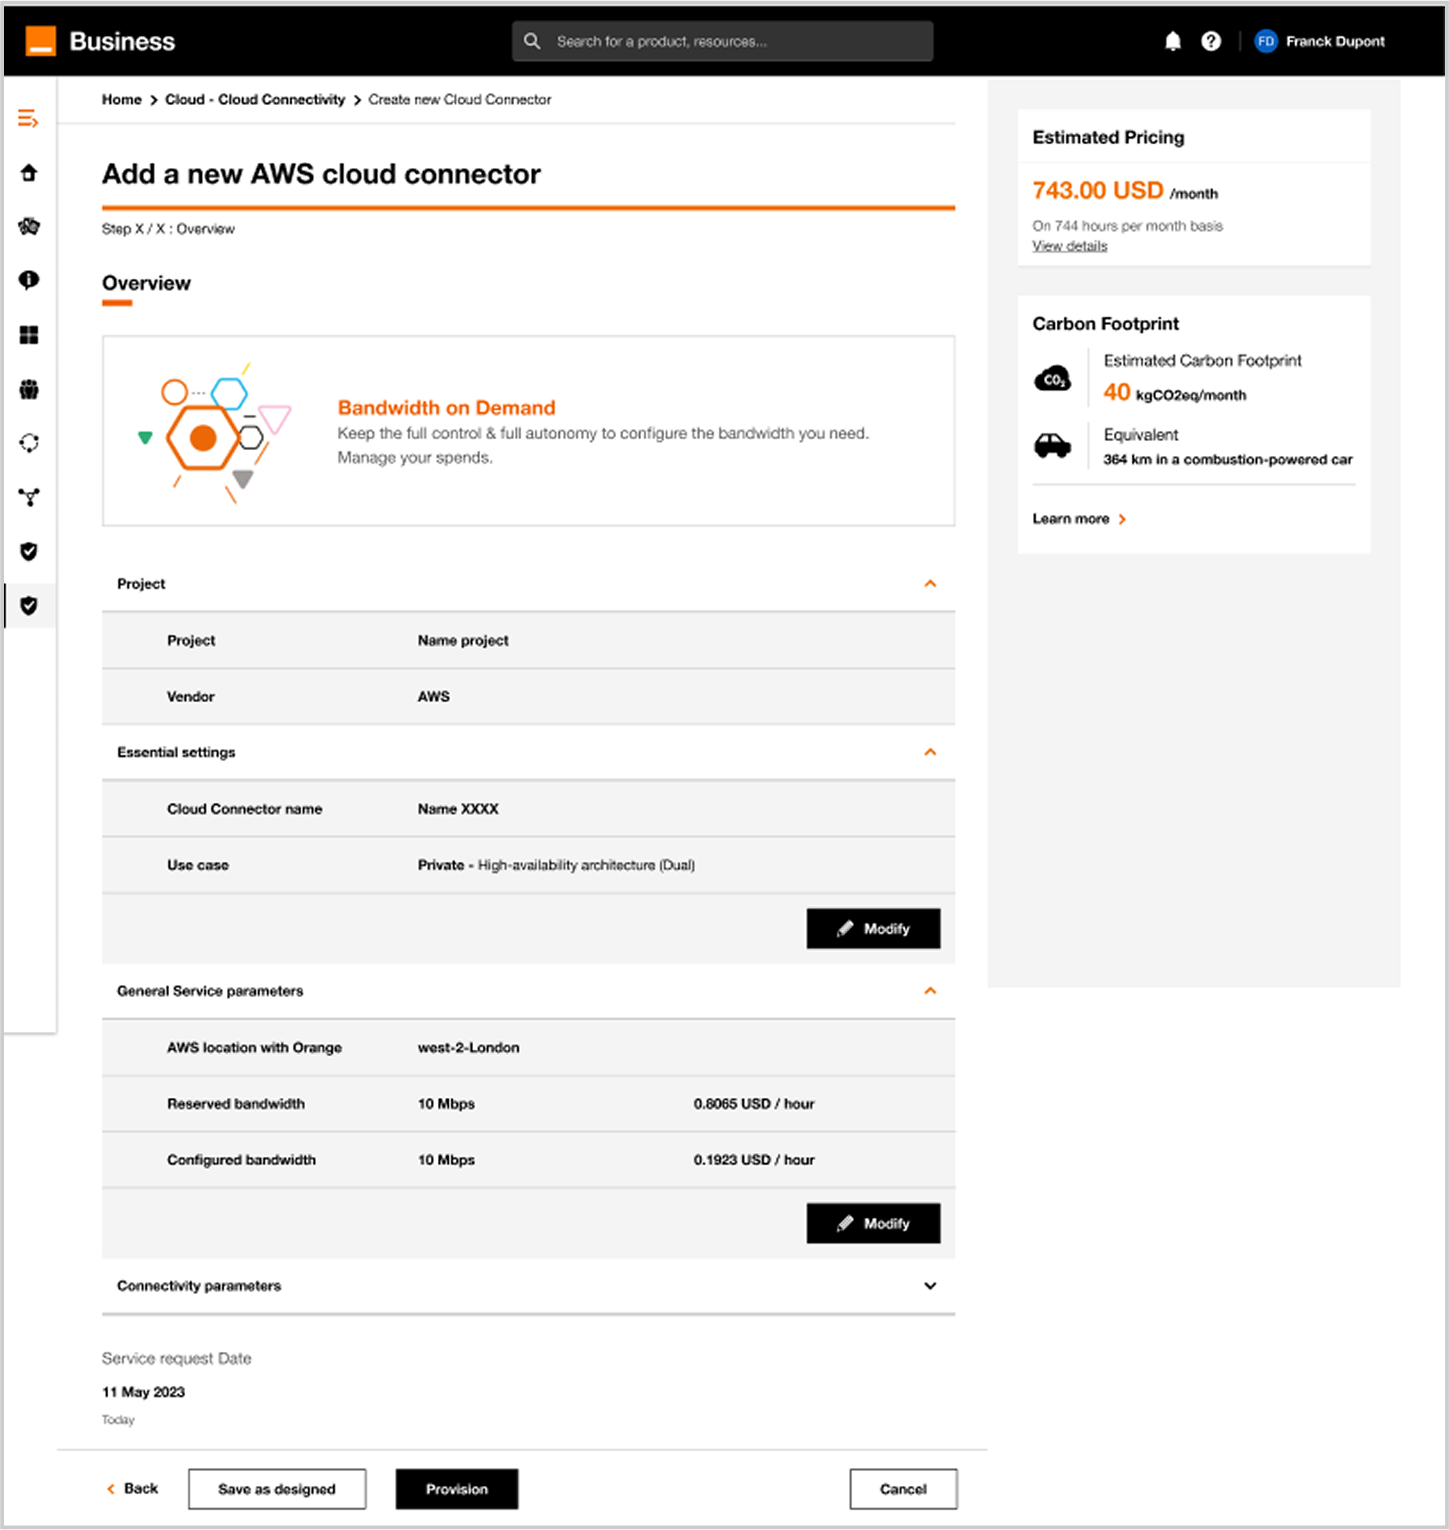
Lorsque vous choisissez Enregistrer tel que conçu, votre connecteur cloud n'est pas encore déployé et peut toujours être modifié.
Le provisionnement peut prendre entre 30 minutes et 1 heure.
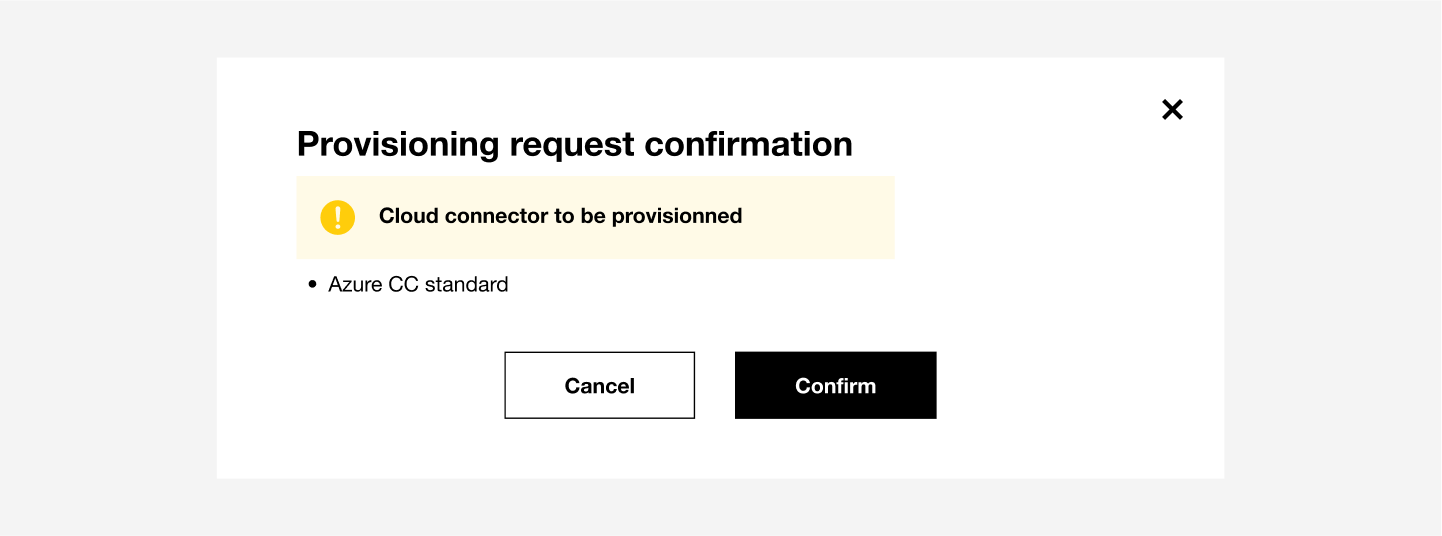
Si vous cliquez sur Save as Designed votre cloud connector ne sera pas déployé et pourra encore être modifié.

Si vous cliquez sur Retour au tableau de bord, vous pourrez suivre le déploiement en cliquant sur Voir workflow d'exécution.
Pour plus de détails sur les éxécutions de workflow se référer à la section Execution workflow.

Inventaire Cloud Connector avec un Cloud Connector modifié.