Private Self made Cloud Connectivity - Edit resource
In this guide, we will walk you through the steps to modify a cloud connector in designed status.
From the Inventory, select the cloud connector
Only a cloud connector in Designed status can be modified.
Select the cloud connector in the inventory and click on the tree dots on the right and click on "Edit resource":
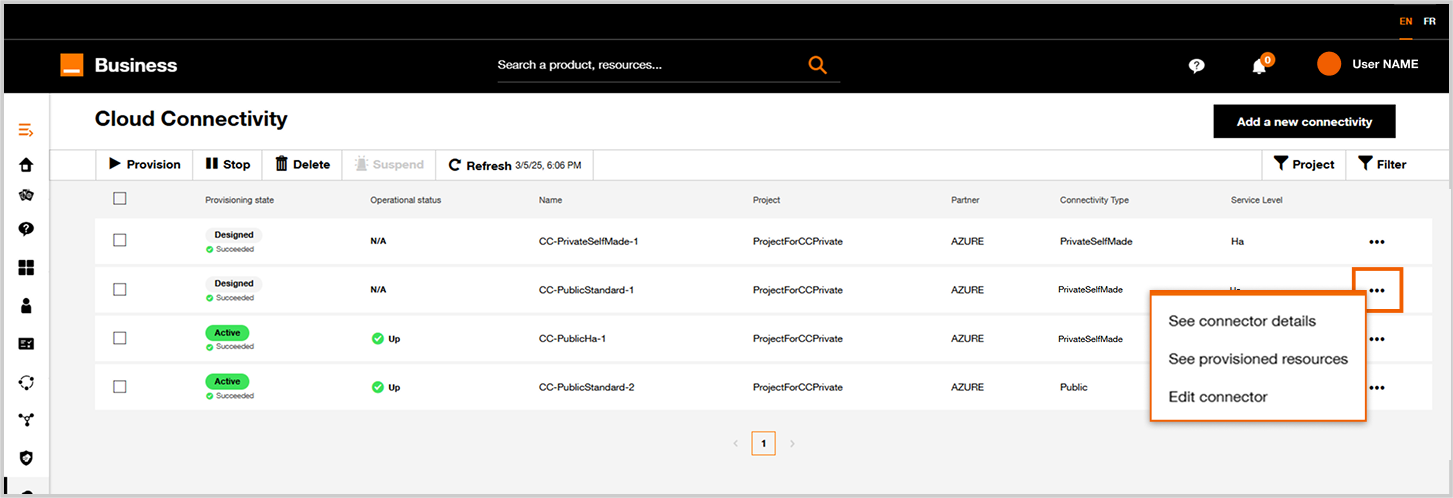
Cloud connector inventory.
Step 1 : Project

Update connector form step 1.
You can't change the project attached to a cloud connector.
You have to create a new cloud connector with the corresponding project.
Step 2 : Modify Cloud connector parameters
The journey is quite the same as the creation one, except for the flavor option which can’t be changed.
After clicking on Next, the following form will be displayed:
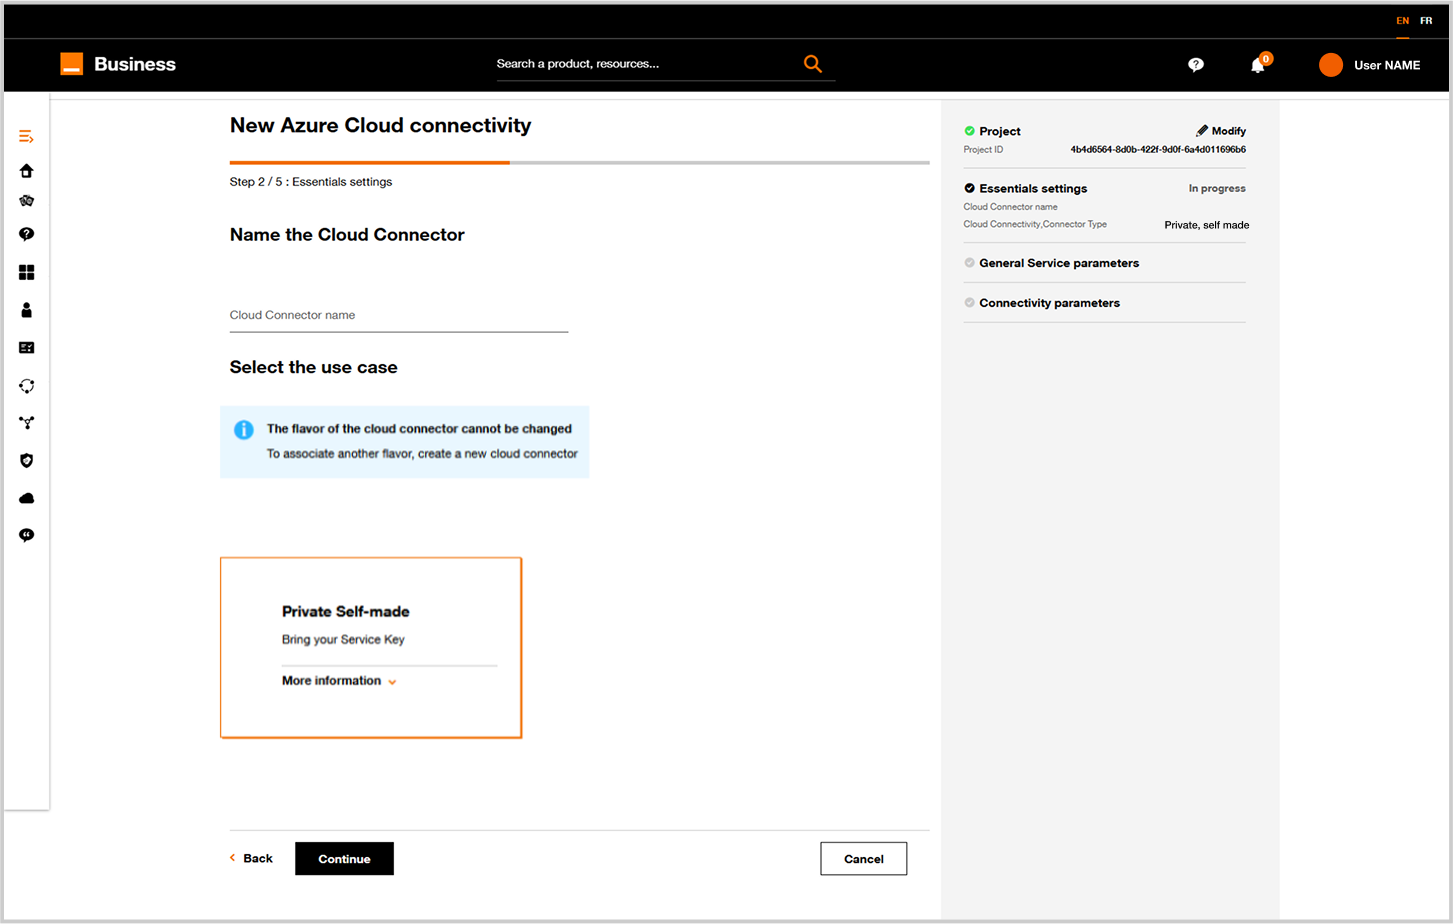
Update connector form step 2.
Step 3 : Cloud configuration
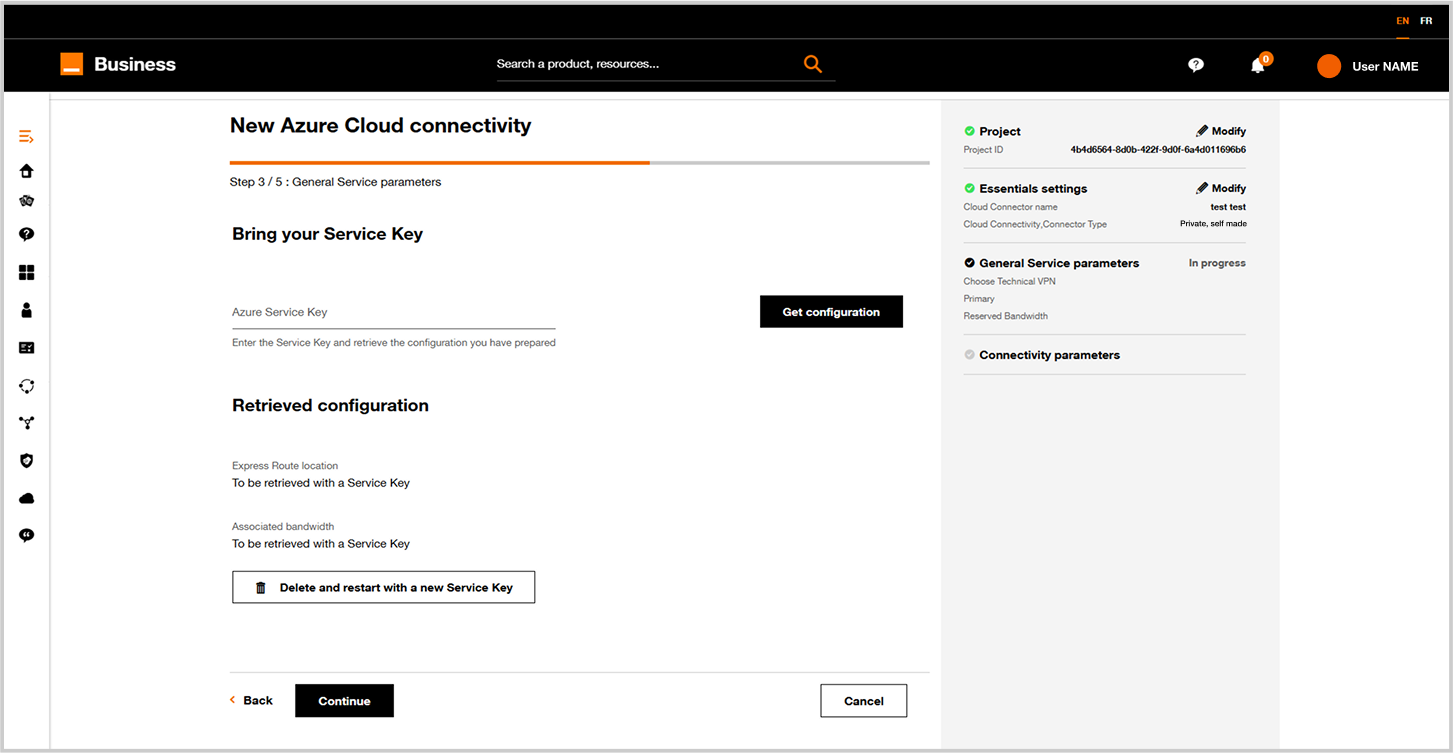
Update connector form step 3.
If you need to change the service key. Apply the following process:
- Delete and restart with a nex service key
- Fill the Azure service key field with a new service key
- Finalize the change by clicking
Get configuration
Click on Next button.
Step 4 : Connectivity parameters
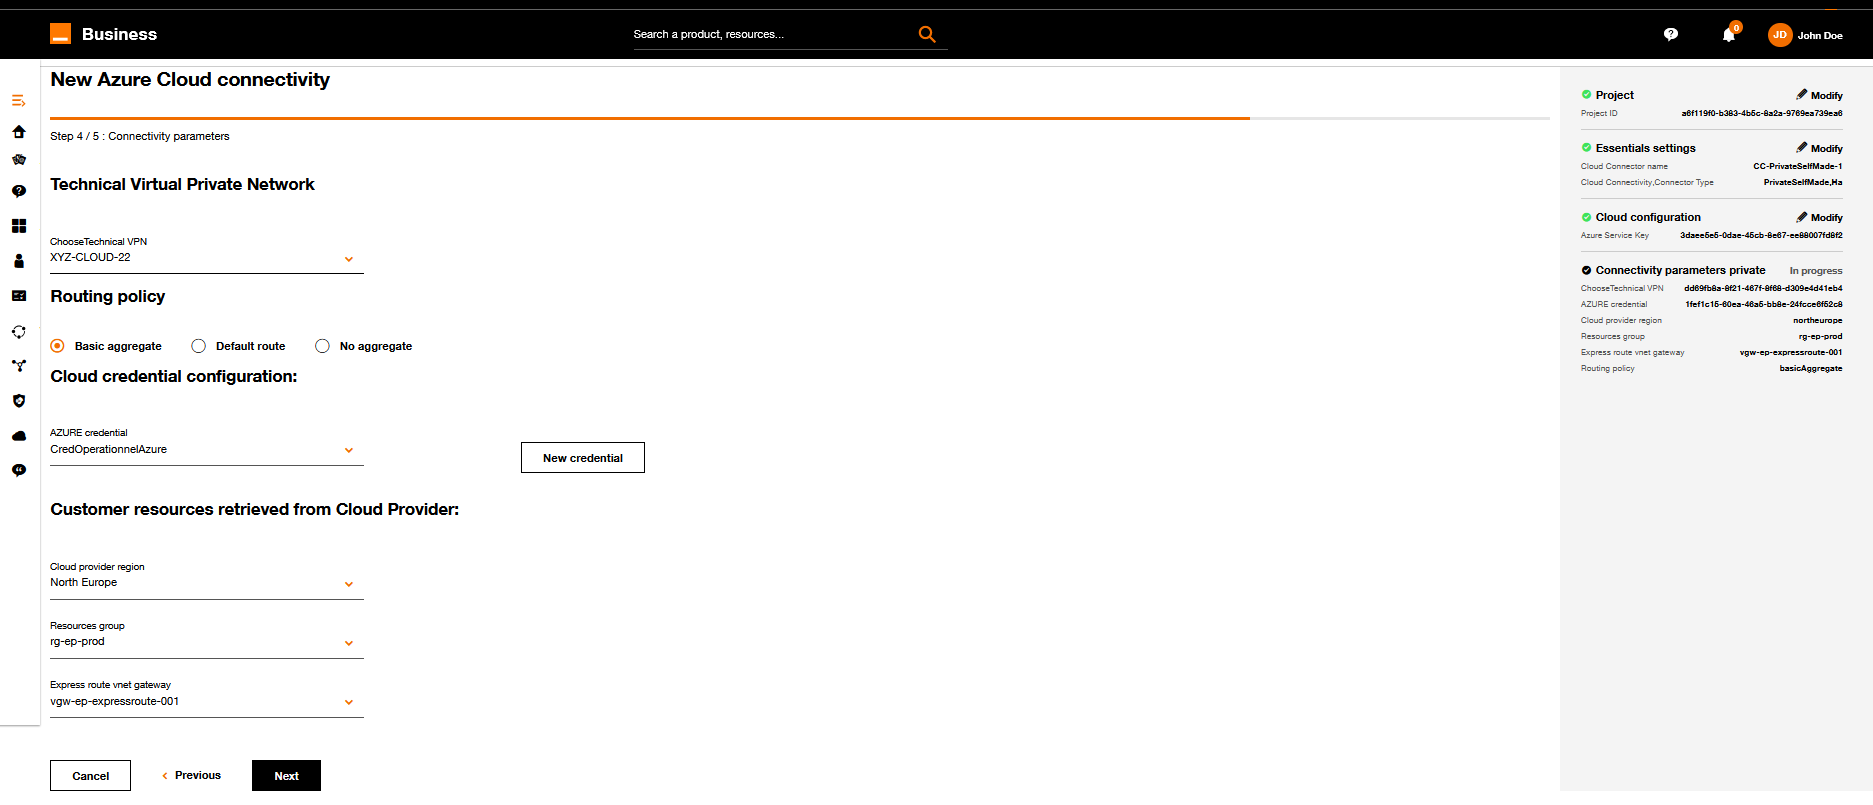
Update connector form step 4.
Apply the requested changes and click onNext when it's ok.
Step 5 : Summary and pricing
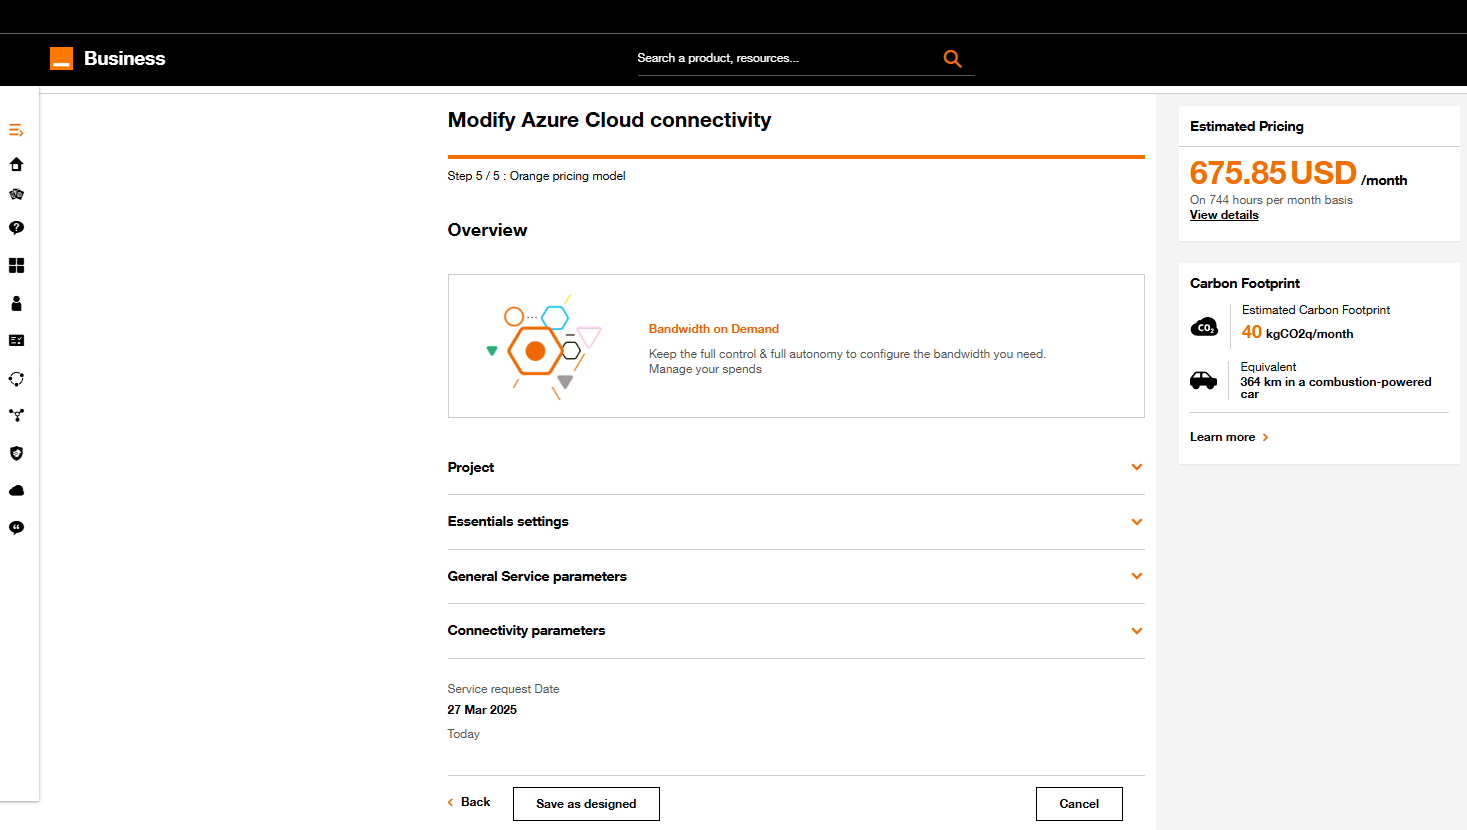
Update connector form step 5.
- On this screen you have on the right a summary of the cloud connector configuration.
- Soon you will have an estimated pricing for this configured cloud connector.
Click on Save as designed if you want to save your new configuration.
You will be able to provision the cloud connector from Cloud Connector Inventory. See Provision.
When you choose Save as Designed, your cloud connector is not deployed and running yet and can still be modified.
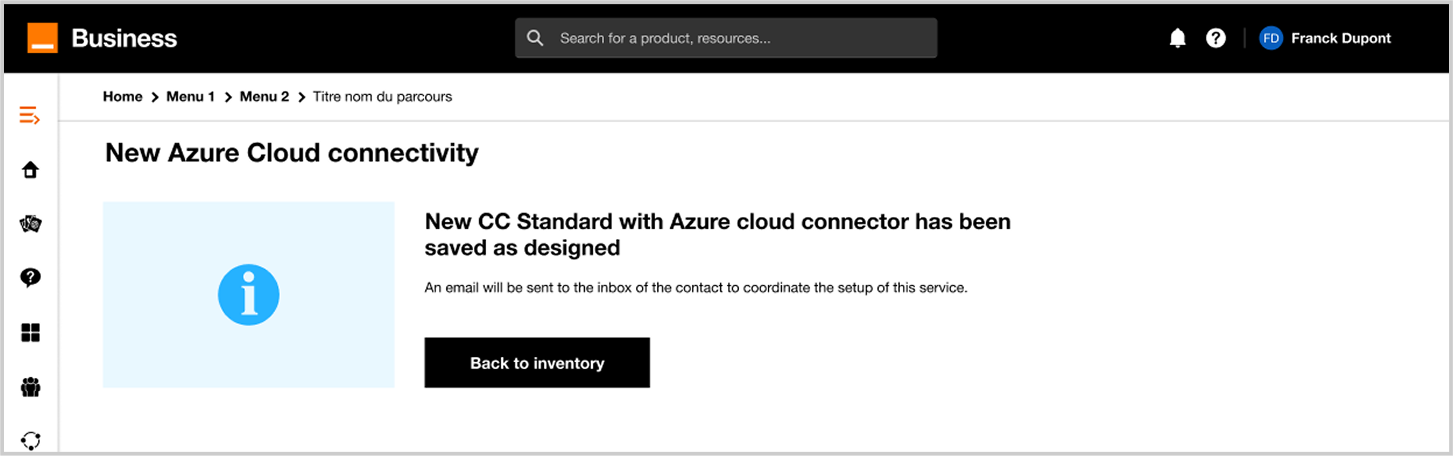
If you click on Back to the dashboard, you can see your updated cloud connector in the inventory.
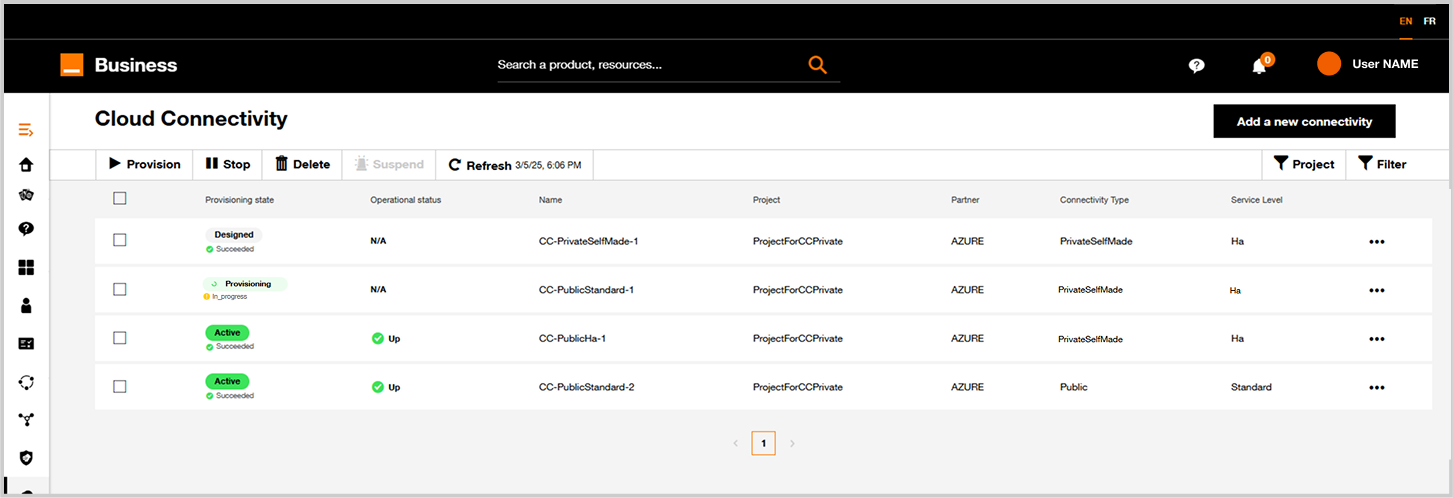
Cloud Connector inventory after a Cloud Connector update.