Aviatrix Secure Edge - Create
An Aviatrix Secure Edge can be created on Evolution Platform.
To create an Aviatrix Secure Edge:
- Sign in to Evolution Platform Console
- Click on Virtual Network Edge icon () in the left-hand menu to access to the Virtual Network Edge dashboard.
- Then click on Add a Virtual Edge button
- Choose your Virtual Edge by clicking on Select button
Next, follow the steps below in the order:
1. Select project
- Select the project in which you want to deploy your virtual Edge:
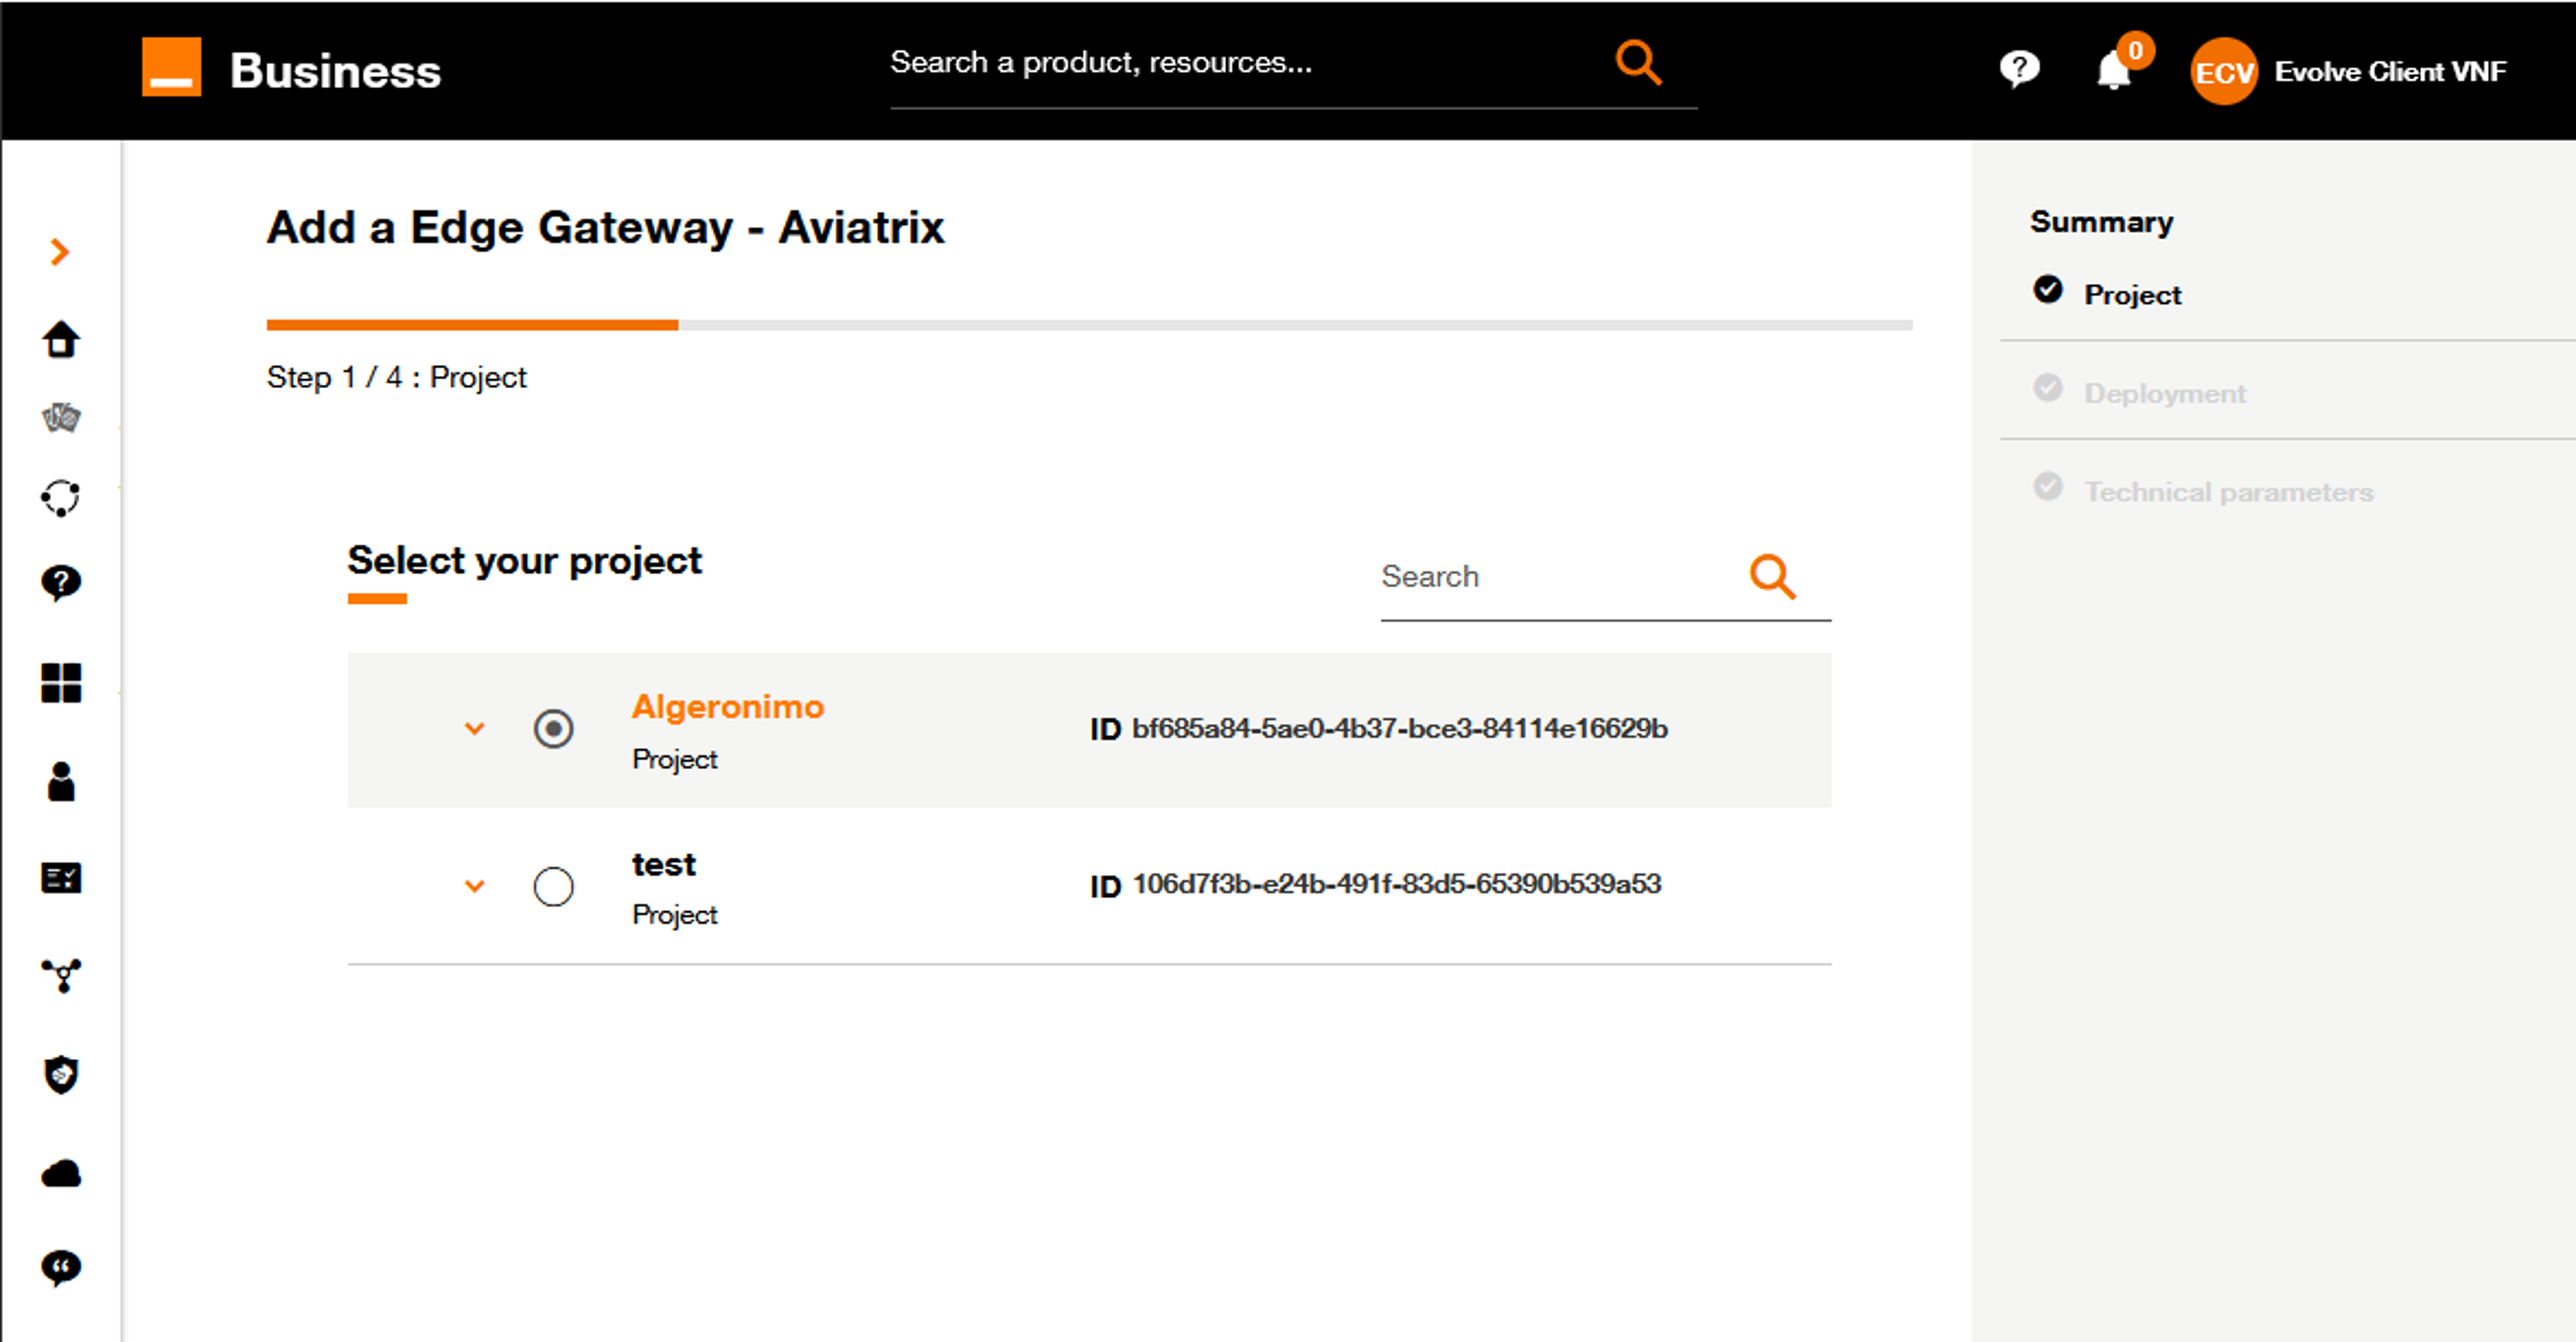
Select your project.
2. Deployment configuration
- Name your Virtual Edge (This name will be displayed on the Virtual Network Edge dashboard)

Set Virtual Edge name.
- Select the deployment configuration: Single, Cluster or Dual
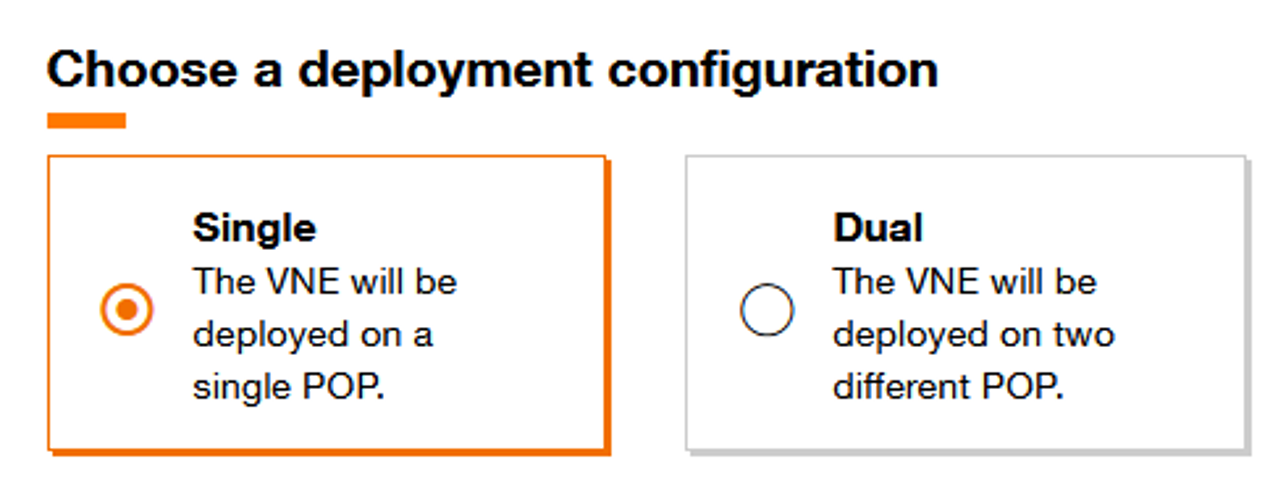
Select deployment configuration.
Not all topologies are suitable for all VNF vendors.
- Select the Software version.
Available software versions for Aviatrix Secure Edge are :
- 7.0-2023-05-18
- 7.1-2023-04-24
- Select the Virtual Device flavor.
Available flavors for Aviatrix Secure Edge are :
| Standard | DPDK | |
|---|---|---|
| Small | 2 vCPU 4 GB Mem 64 Go Disk | - |
| Medium | 4 vCPU 8 GB Mem 64 Go Disk | - |
| Large | 8 vCPU 16 GB Mem 64 Go Disk | - |
- For Dual or Cluster topology, different flavors can be selected for each Virtual device.
- DPDK (Data Plane Development Kit) is a set of libraries and drivers designed to acceler- ate packet processing and optimize performance in network applications. It provides a high-performance framework for managing network traffic at a low level, bypassing the traditional kernel network stack to enhance throughput and reduce latency
- Click on Continue button to continue the journey or click on Save as draft button to save the current deployment configuration.
3. Technical parameters
Virtual Devices parameters
-
Fill the Virtual Device name (This name will be used as hostname for the virtual device).
-
Select the Region.
-
Select the Orange POP which correspond to the location of POP.
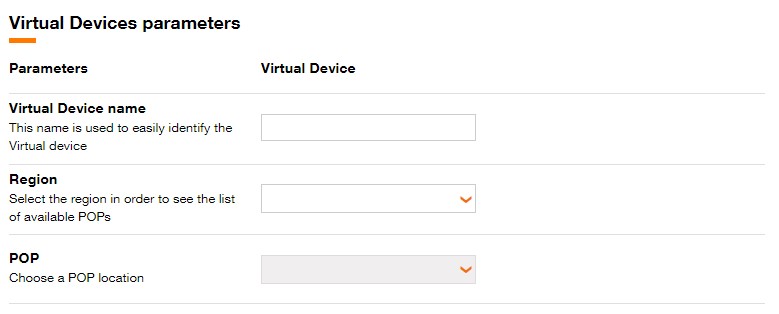
Fill Virtual Device Name, Region and POP.
For Dual or Cluster topology, different POP can be chosen for each virtual Device .
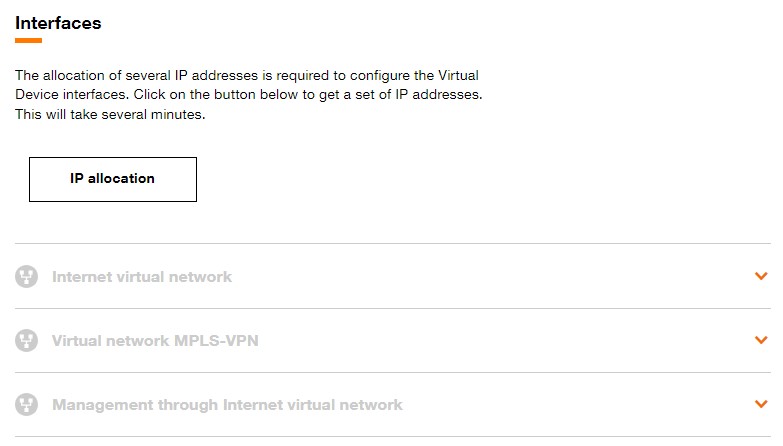
Interfaces
An IP Allocation is mandatory before configuring the interfaces.
- Click on IP Allocation button to reserve a Public IP for management interface and WAN interface.
IP allocation.
The IP address allocation process takes a few seconds. Once completed, the message below will be displayed, and you can proceed with the VNE configuration.

IP allocation success message.
The interface configurations are specific for each type of virtual Device.
- Select the VPN Id via the drop-down menu
- Select the VPN role via the drop-down menu
These two parameters define the type of VPN (any to any or client / server) for this interface available to this feature.
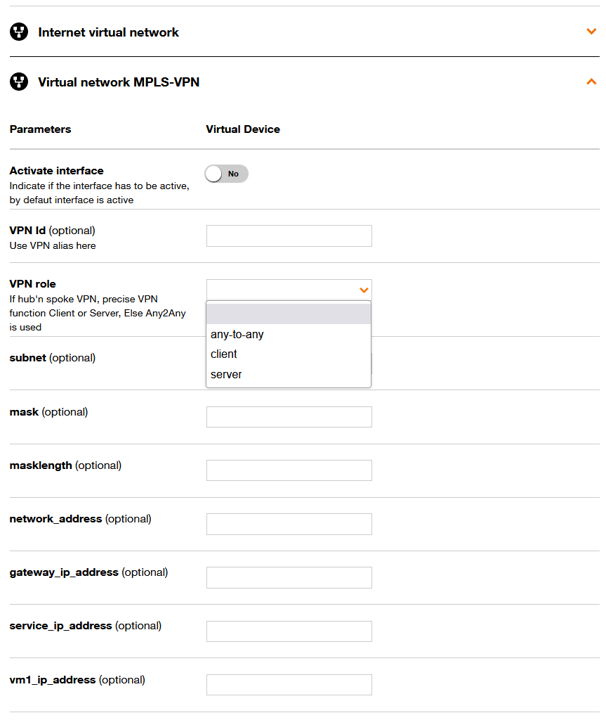
Configure Aviatrix interfaces.
Virtual device configuration
- Upload your cloud-init in *.ini format by selecting your file
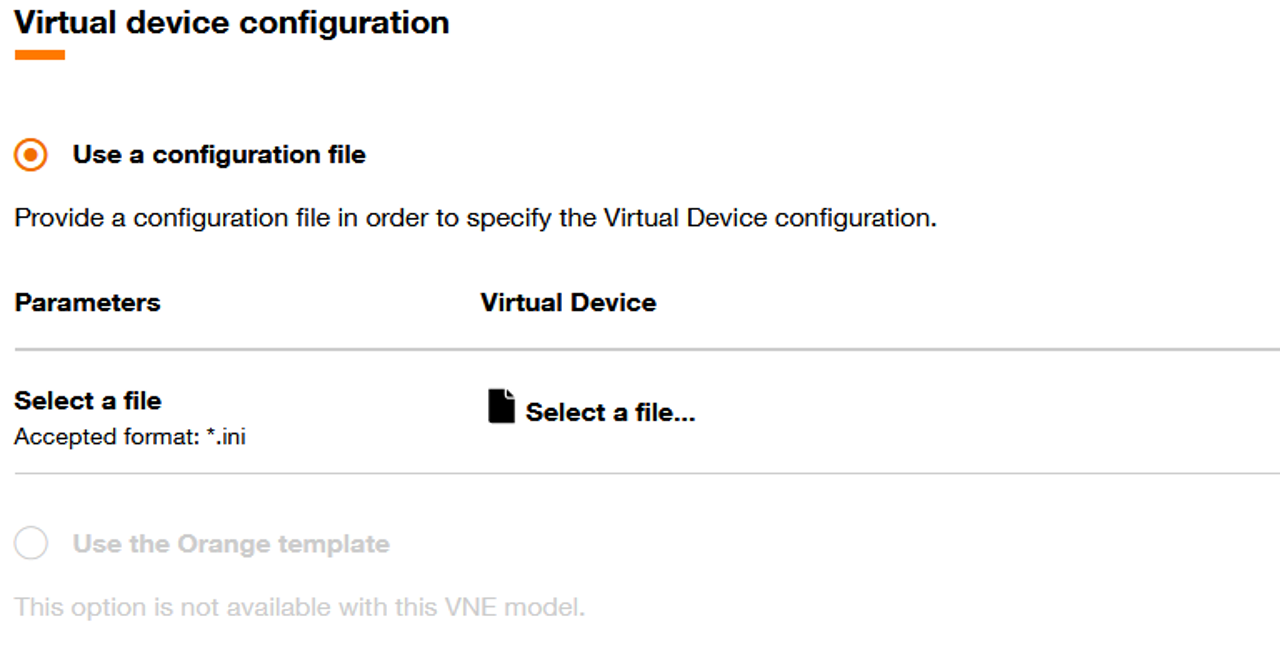
Provide a configuration file.
Service specific parameters
- Fill in transit gateways networks, Controllers networks and Copilots networks.
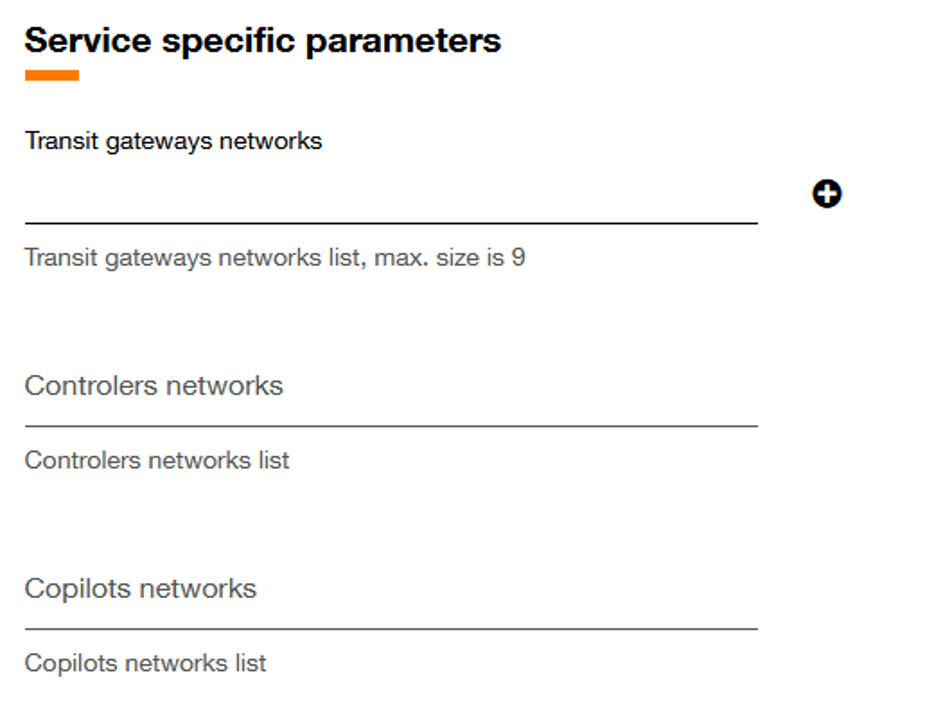
Fill in Copilots neworks and transit gateways networks.
- Click on Continue button to continue the journey or click on Save as draft button to save the current deployment configuration.
4. Validation
After clicking the Continue button, the screen below will be displayed.

Deployment summary.
Click on the Provision button to initiate the provisioning of the Virtual Network Edge.
You also have the option to save the design of the Virtual Network Edge configuration by clicking on the Save as Design button.
In this case, you will find the Virtual Network Edge in designed state on the .
Save as design is automatic if no save as draft has been done before this step and the following pop-up is displayed:
