Public Cloud Connectivity - Stop
In this guide, we will walk you through the steps to stop an active Azure cloud connector. Let's get started!
1. Select the Azure cloud connector menu
Select the Azure cloud connector menu
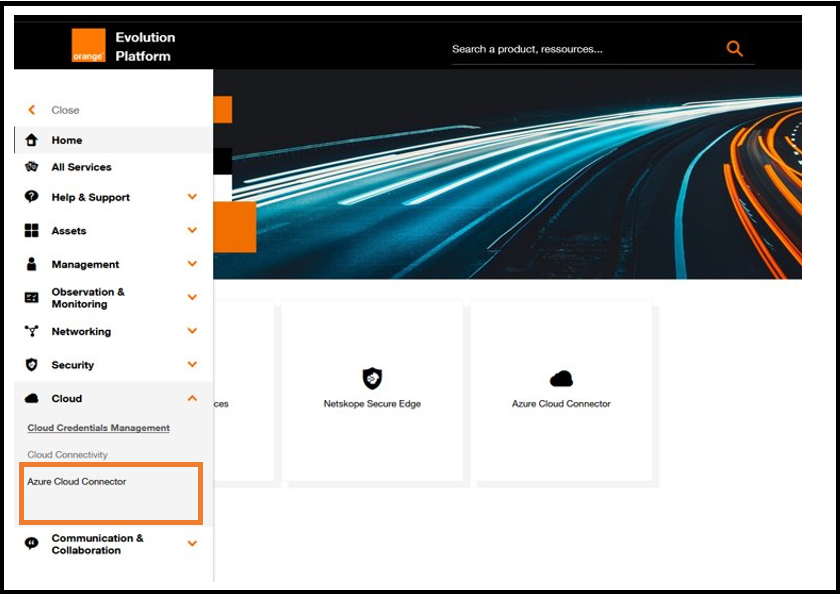
Access to Azure cloud connector menu.
2. Stop cloud connector
Select the Azure cloud connector in the list and then click on Stop
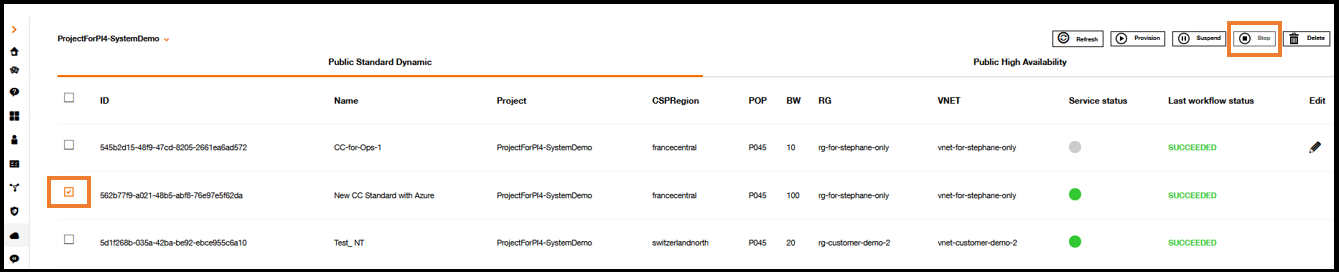
Azure cloud connector dashboard.
After clicking on Stop button, the following popup will be displayed:
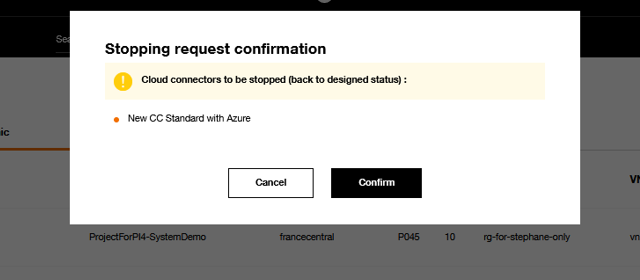
Deletion request confirmation popup.
To stop the cloud connector, simply click on the Confirm button. If you do not wish to stop it, click on Cancel instead.
After clicking on the Confirm button, the cloud connector will appear as 'stopping' in the inventory, as shown in the screen below.
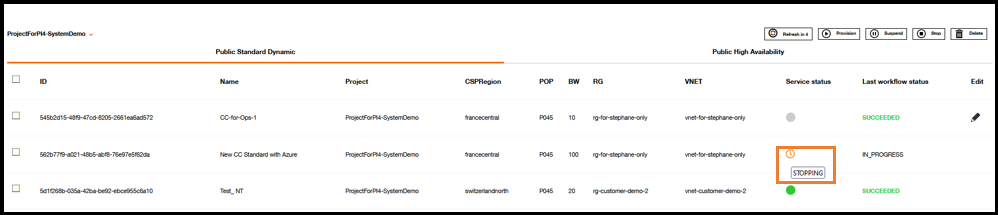
Azure cloud connector dashboard.
See Inventory and Execution workflow for details.
The process of stopping the cloud connector may take approximately 30 minutes to 1 hour, but the billing for the cloud connector is stopped as soon as the stop command is sent.