Public Cloud Connectivity - Add new connectivity
In this guide, we will walk you through the steps to provision or designed an Azure cloud connector. Let's get started!
1. Add new connectivity
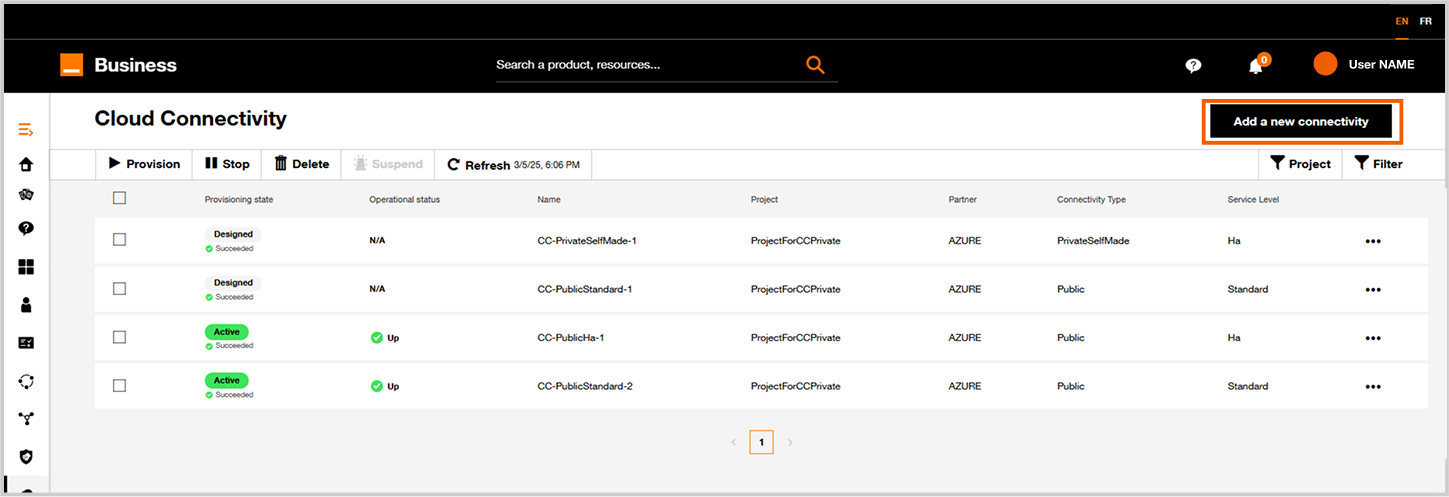
From the inventory, in the upper right, click on the "Add new connectivity" button.
2. Choose you service provider
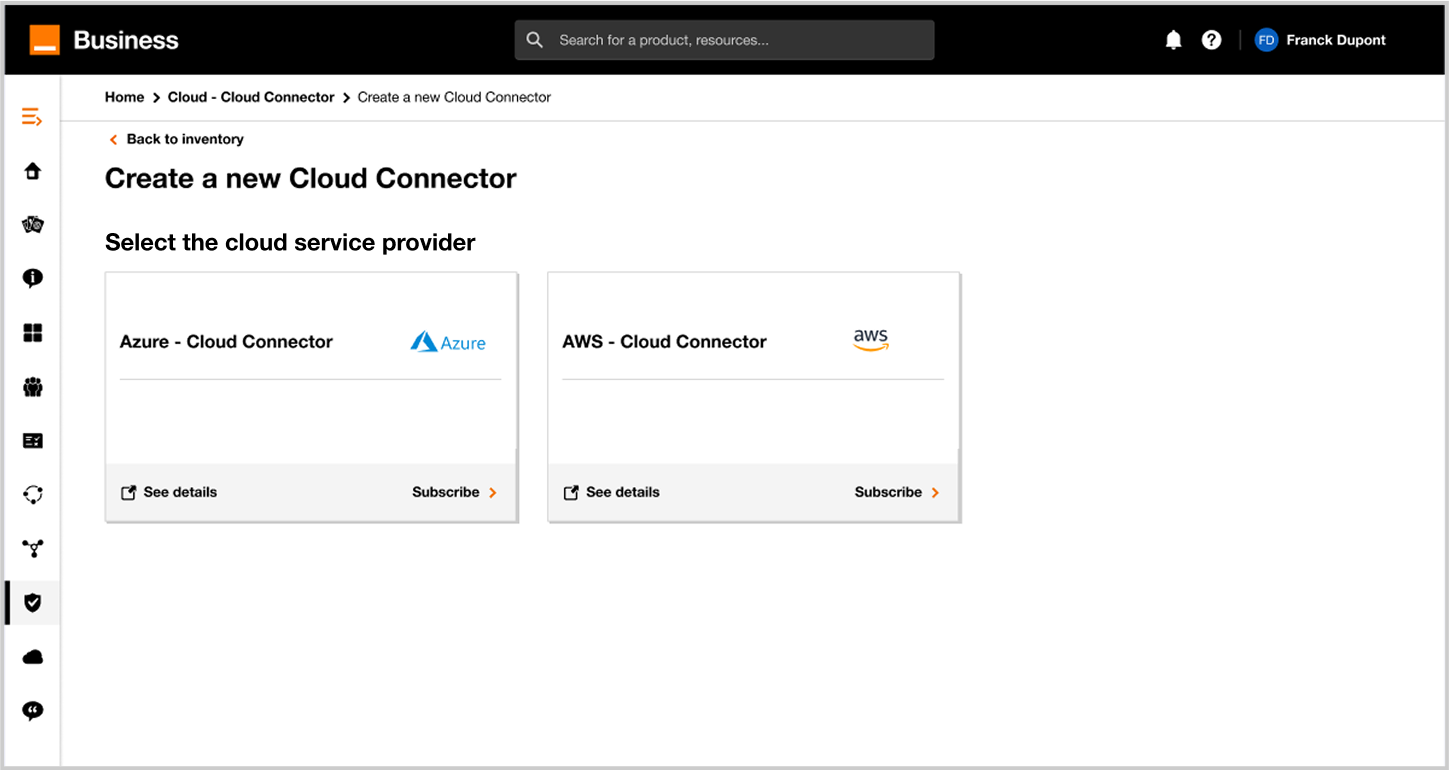
For this exemple, click on "Subscribe" link in Azure tile.
3. Select your project
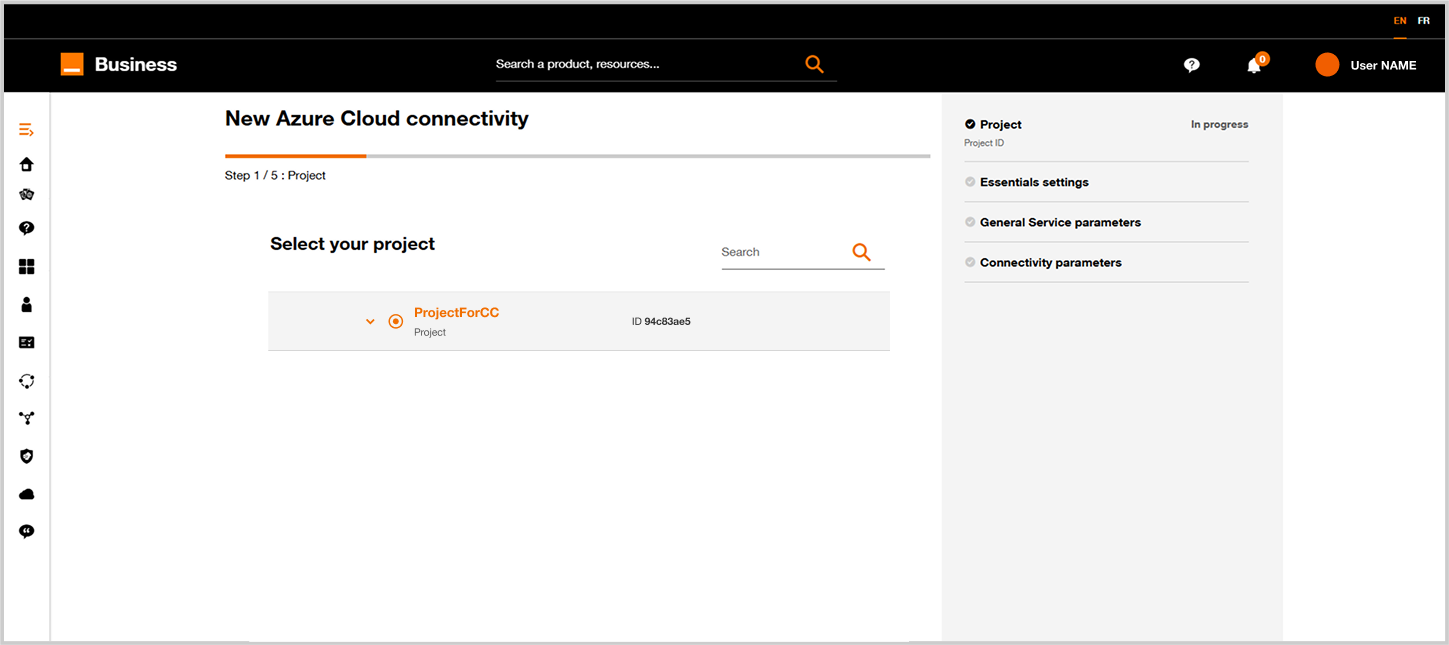
Select an existing project for a cloud connectors hosting the Cloud connector.
4. Fill in the First Settings Form
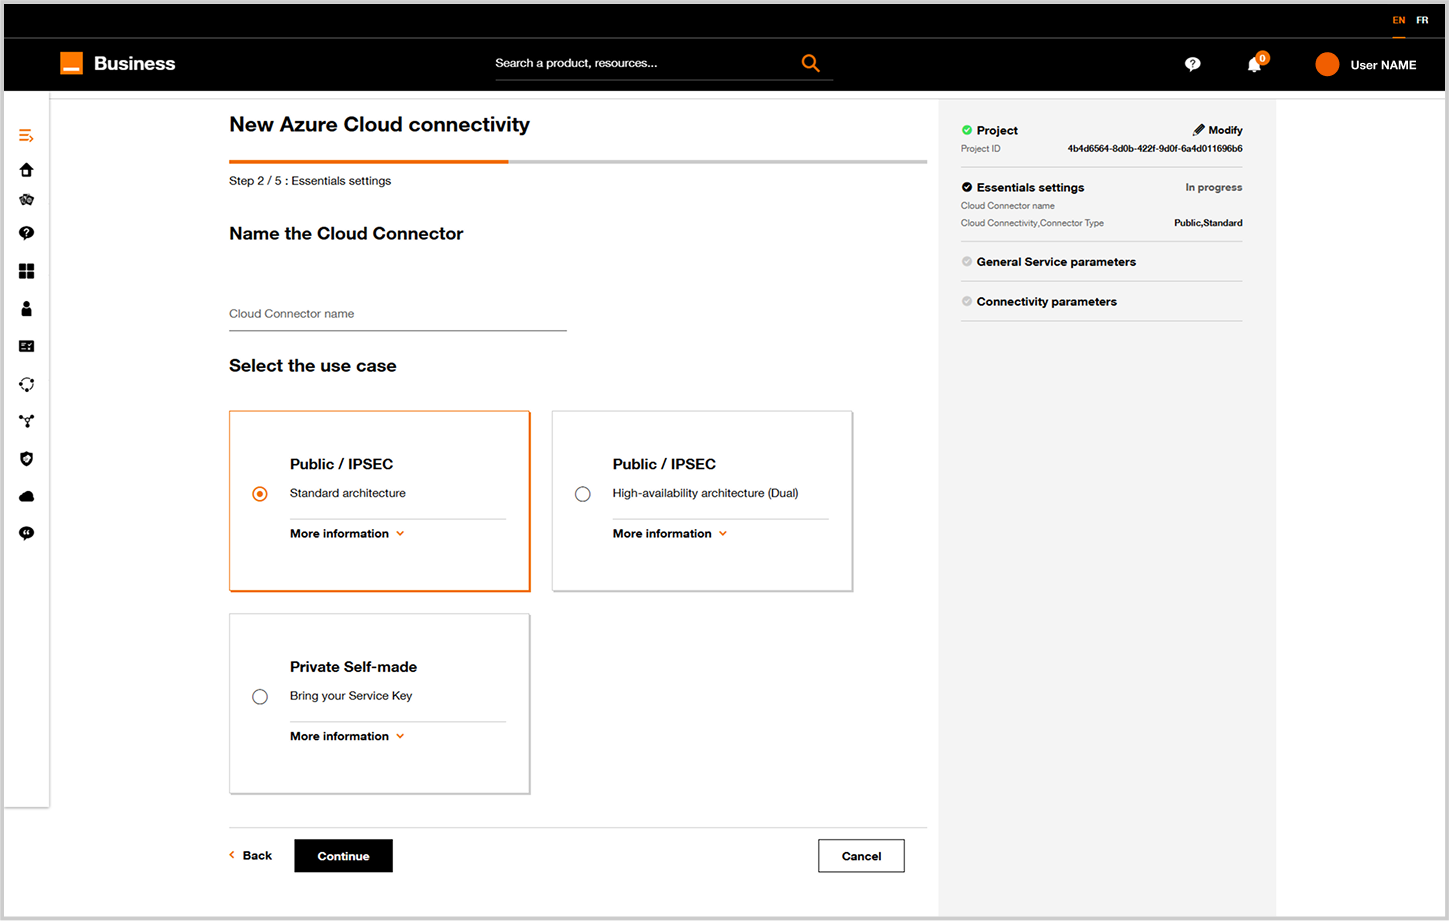
- Define a name for your new Cloud Connector.
- Identify whether you need a single or HA (High Availability) cloud connectivity (cf. flavors description in Public cloud connector)
- Click on
Nextbutton
5. Define the Technical Virtual Private Network and the Orange POP and bandwidth settings
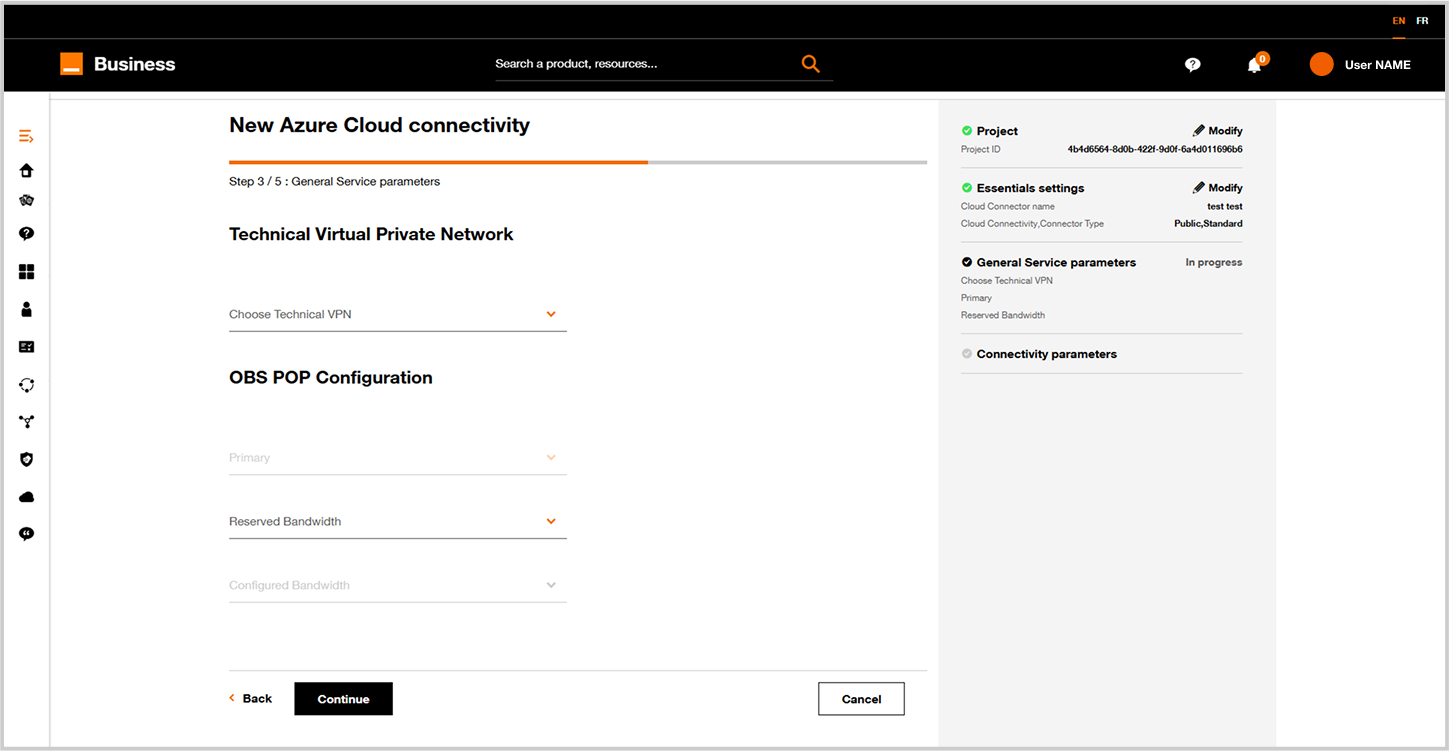
Select the existing and known VPN on which you want to connect the cloud connector.
Define the Orange POP from which you want to build the Cloud connector, (standard connection One POP, for HA select primary and secondary POP) and define the bandwidth you need for it.
6. Network settings
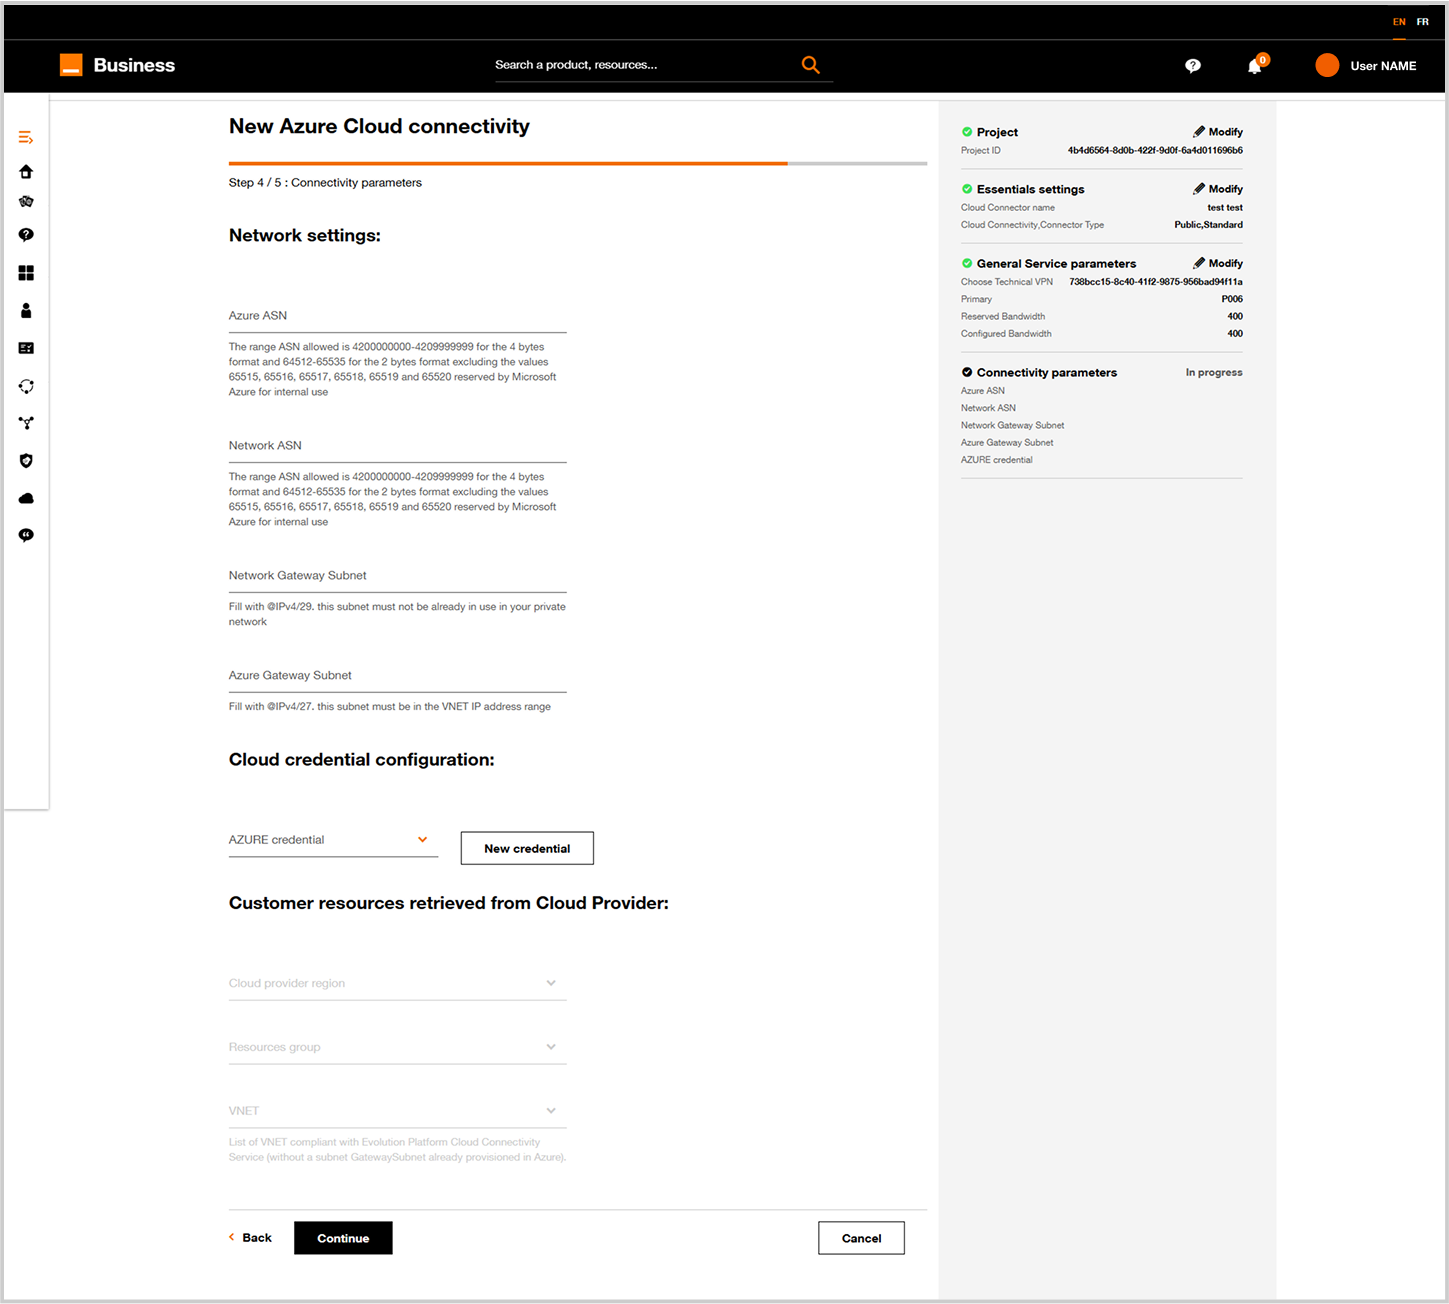
Indicate the network settings to be used.
| Parameter | Description |
|---|---|
| Azure ASN (AS Number) | BGP Private ASN allocated by the customer to identify AZURE IP routes announced to Orange Business Network. This ASN has to be unique in the whole customer network. Private ASN range is 64512 to 6553. 65515 to 65520 are excluded as there are used by Microsoft Azure for internal use. |
| Network ASN (AS Number) | BGP Private ASN allocated by the customer to identify Orange Business IP routes announced to AZURE Network. This ASN has to be unique in the whole customer network. Private ASN range is 64512 to 65535. 65515 to 65520 are excluded as there are used by Microsoft Azure for internal use. |
| Network Gateway Subnet | A /29 IPv4 address allocated by the customer. This /29 have to be unique in the whole customer private network (including VNET/VPC in Cloud) |
| Azure Gateway Subnet | a /27 IPv4 address subnet for VPNGW addressing within the VNET addressing plan in AZURE. CIDR notation (i.e something like 192.xxx.xxx.xxx/27). |
Cloud credentials configuration and customer resources
Select the Cloud credentials to be used for the Azure VNET resources to reach, then select the Azure region, resource group and VNET.
The resource group and VNET are retrieved from the customer Azure environment linked to the Cloud credentials selected.
If a VNET is already used with a VPN gateway, it won’t be displayed in the VNET list.
For information on Cloud credentials see Cloud credentials section then Click on Next button
7. Summary and Pricing
- On this screen you have on the right a summary of the cloud connector configuration.
- Soon you will have an estimated pricing for this configured cloud connector.
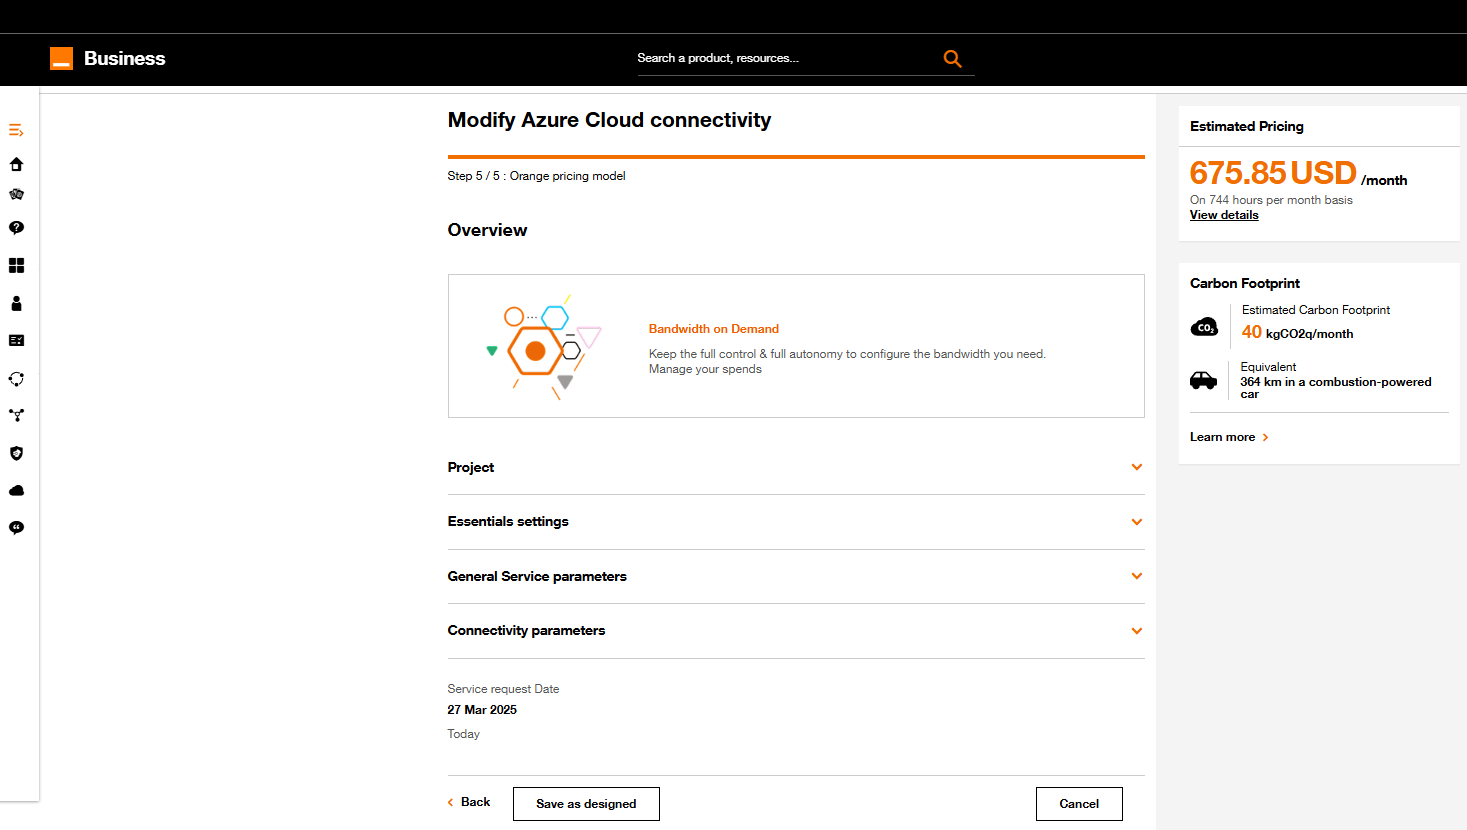
8. Provision or Save as “Designed”
Click on Provision to directly deploy the cloud connector, Save as designed if you want to provision the cloud connector later.
When you choose Save as Designed your cloud connector is not deployed and running yet and can still be modified.
When clicking on Provision, a screen will appear, indicating the cloud connector is being provisioned.
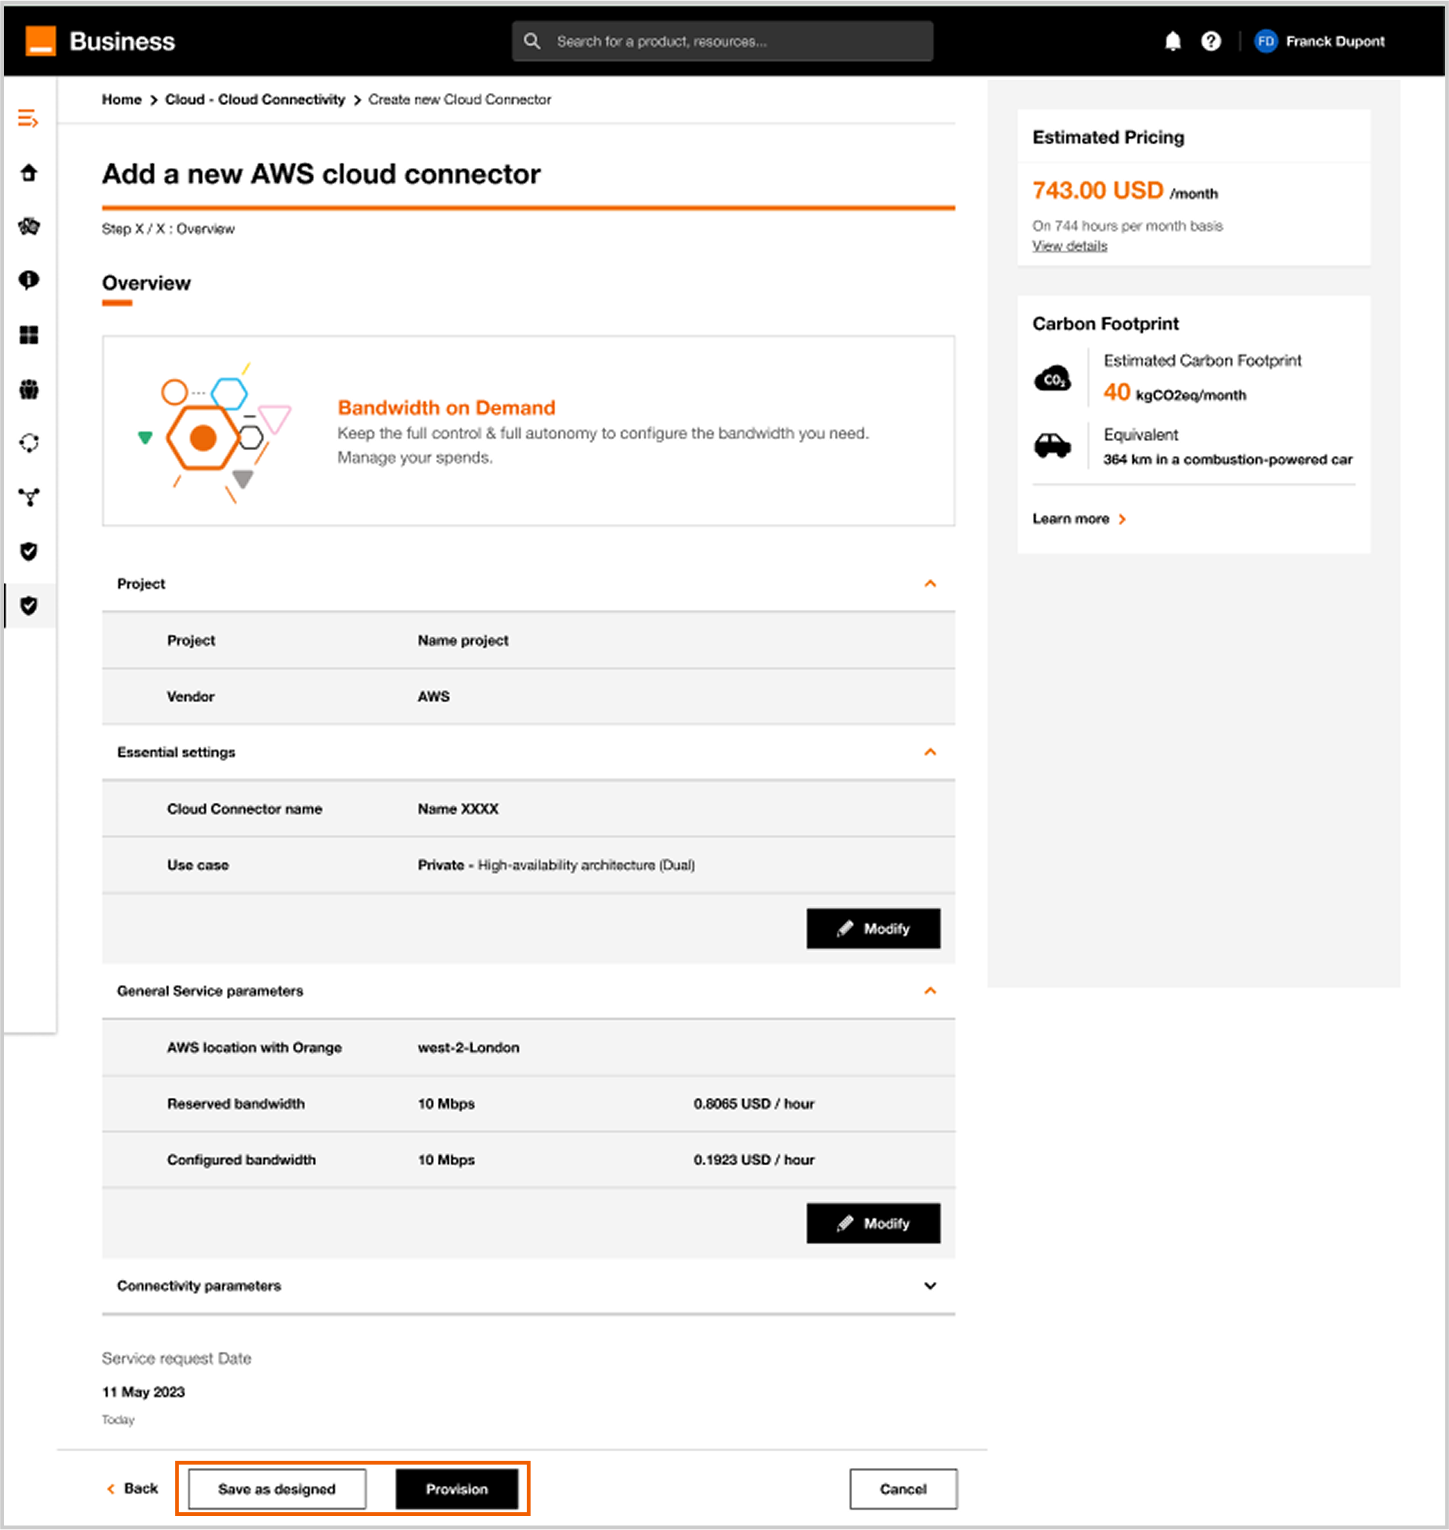
Provisioning may take between 30 minutes and 1 hour.
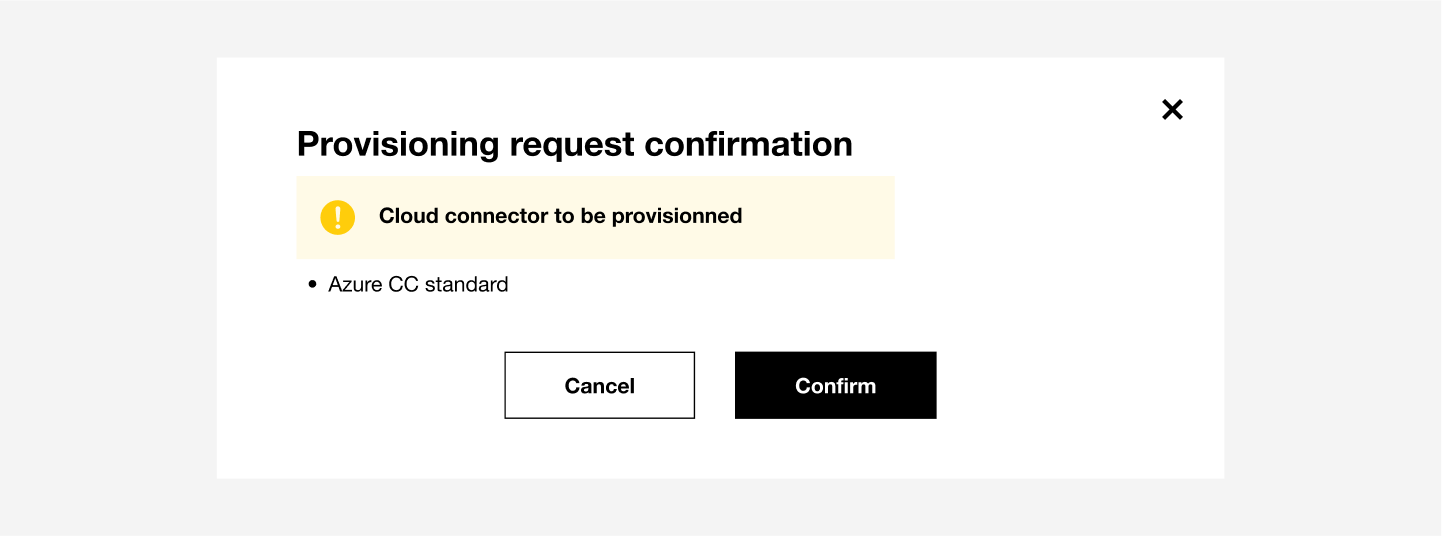
When you choose Save as Designed your cloud connector is not deployed and running yet and can still be modified.

If you click on Back to the dashboard, you can follow the deployment by clicking on the workflow/status icon.
Refer to Workflow Execution section.
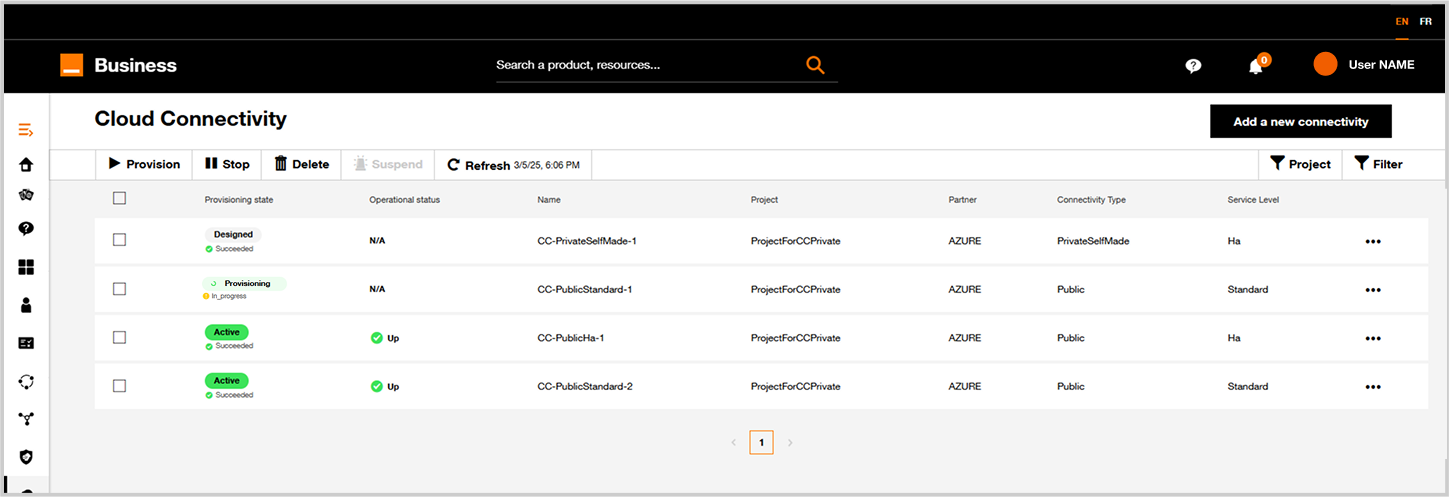
The green icons indicate that the Cloud Connectors are active.
In a click you can access the latest workflow execution details.
See Inventory and Workflow Execution for details.