Create a VPN
Add a new VPN
From the inventory page, in the upper right, click on the "Add new" button.

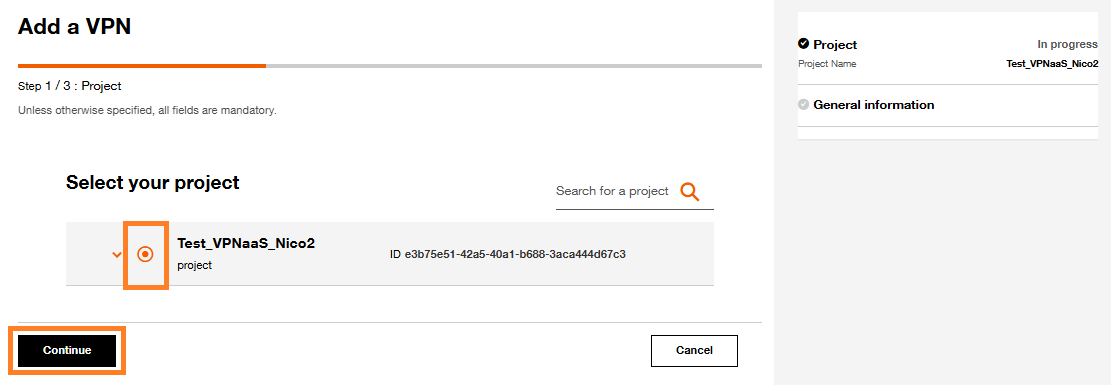
Select your project
Select an existing project, then click on "Continue" button
Fill in the settings form
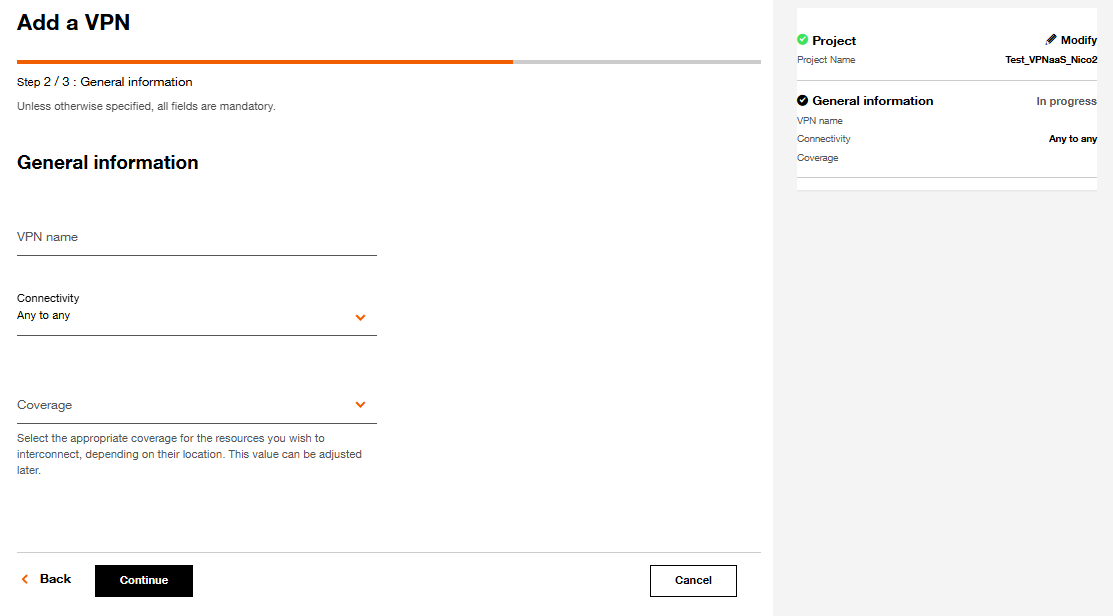
Define a name for your new VPN. The name must be 1 to 50 characters long and can only include letters, digits, hyphens, or underscores.
Choose the connectivity type
Connectivity Description Any to any Services connected and attached to this VPN can reach each other without any restriction and all routing information is shared within this VPN Client Server Services attached to this VPN cannot communicate with each other through the VPN, but they can access all services attached on the "Server" side. Conversely, services on the "Server" side can communicate freely with each other and access all services on the "Client" side Select the desired VPN coverage
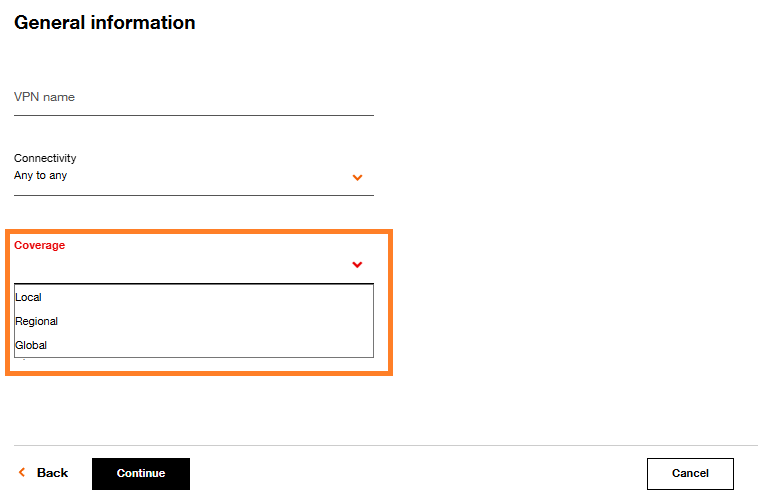
Note : When selecting Local or Regional coverage, a new field appears to choose the region or the SuperPoP location.
- Apply the requested changes and click "Continue" when everything is OK
After clicking the "Continue" button, the screen below will be displayed. Here you have a summary of the VPN configuration, and an estimated carbon footprint.
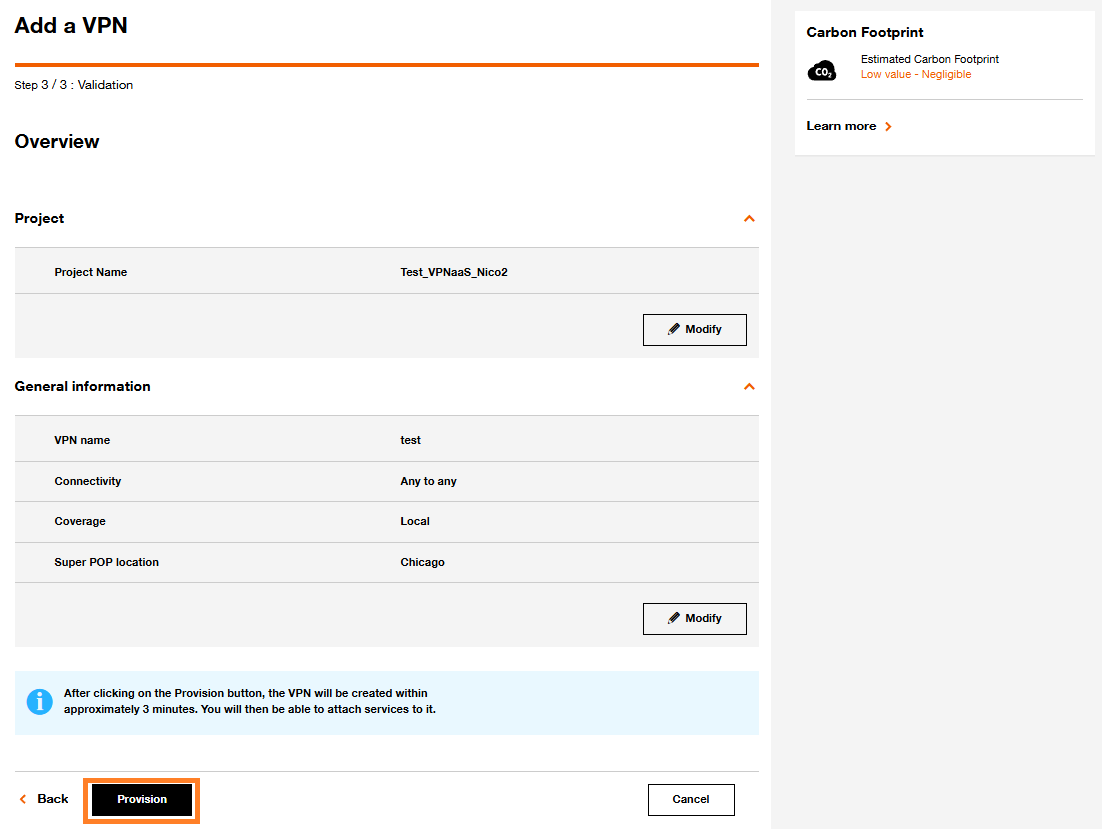
When clicking on "Provision", a screen will appear, indicating the VPN is being provisioned

If you click on "Back to Inventory", you can see your new VPN in the list.